

ZHA Configuration Guide
ZHA (Zigbee Home Automation) is the official Zigbee integration from Home Assistant. Paired with a Zigbee coordinator (USB gateway), it lets you build a Zigbee network directly in Home Assistant and connect all kinds of Zigbee devices. This guide walks through the full process of configuring ZHA and adding Zigbee devices on Donggua HAOS.
Version information
Section titled “Version information”| Name | OS | Core |
|---|---|---|
| Version | 17.0 | 2026.2.1 |
Prerequisites
Section titled “Prerequisites”Before you start, make sure:
- Your Home Assistant is up and running and the admin UI is accessible.
- You have a Zigbee coordinator (USB gateway) ready, and can plug it into a USB port on the HA box.
Note: ZHA and Zigbee2mqtt (Z2M for short) cannot be used at the same time — unless you have 2 coordinators!!!
Choosing between them:
- Z2M (recommended): a large global community of developers and Zigbee manufacturers keeps its device library updated, so it supports more devices than ZHA. When onboarding devices with Z2M, look up the device model and details (photos, features, vendor, etc.) on the Z2M official site.
- ZHA: the official Home Assistant integration, maintained by only a small number of developers, with library files updated along with Core; its supported device library is smaller.
The same device may expose different features in ZHA vs. Z2M — choose based on your needs.
Setup steps
Section titled “Setup steps”Step 1: Find the coordinator’s serial port
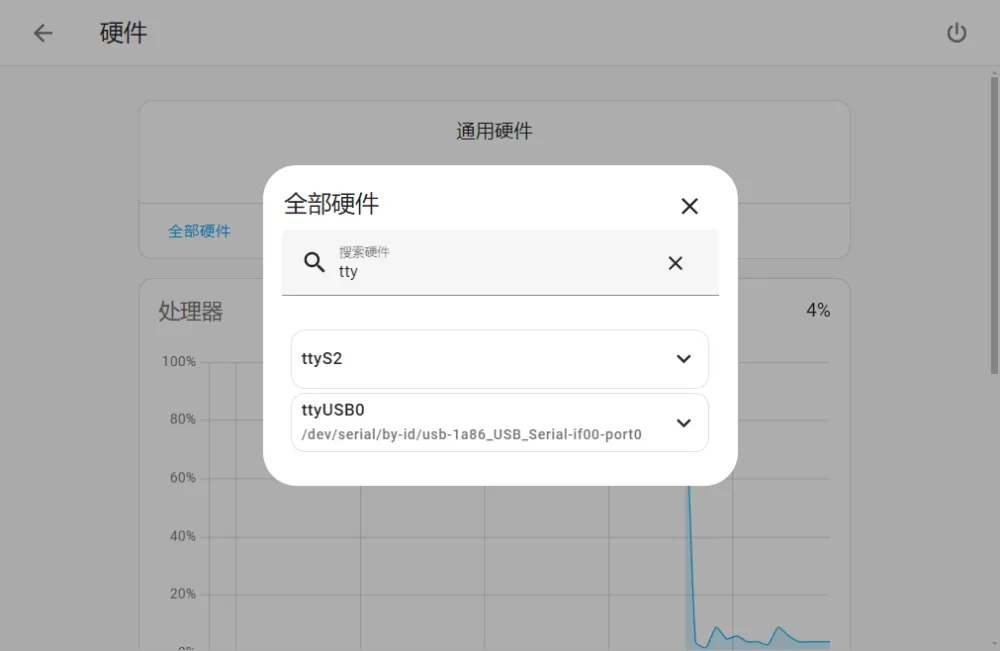
Section titled “Step 1: Find the coordinator’s serial port”Plug the coordinator into the box, then go to Settings > System > Hardware > All Hardware > search for tty. A device named ttyUSBx will appear (assuming no other USB devices are plugged in) — that device is the coordinator.
Step 2: Add the ZHA integration
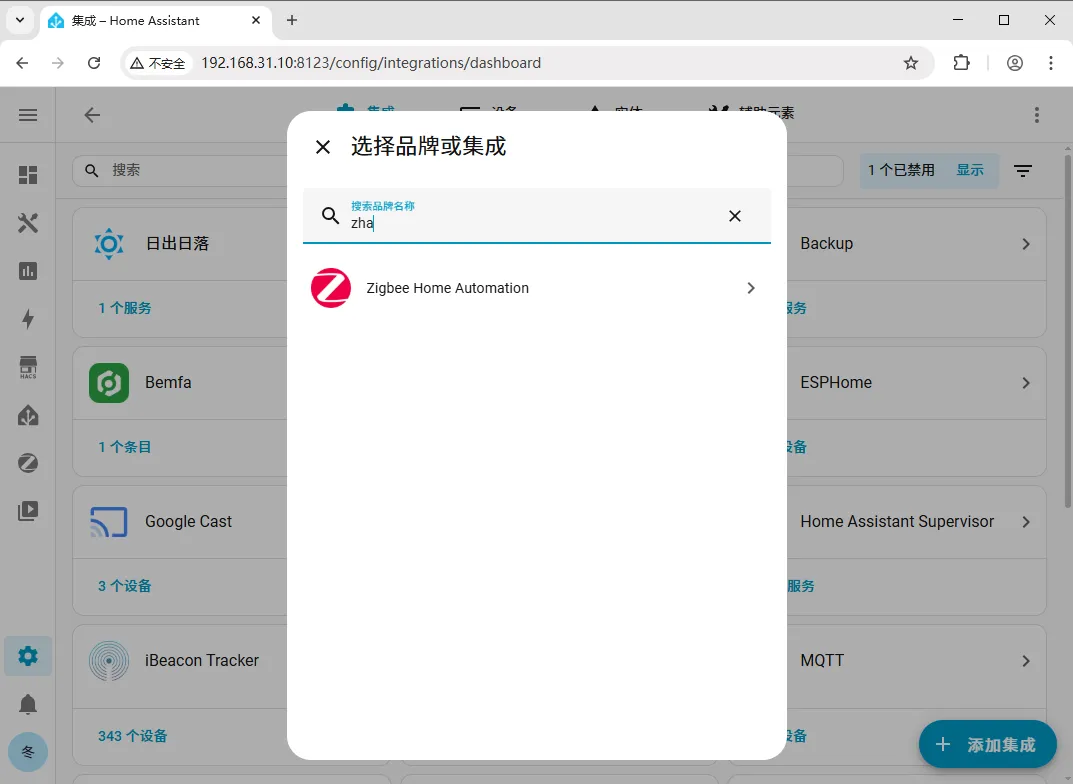
Section titled “Step 2: Add the ZHA integration”Go to Settings > Devices & Services > Integrations > Add Integration > search for zha.
Step 3: Select the coordinator port
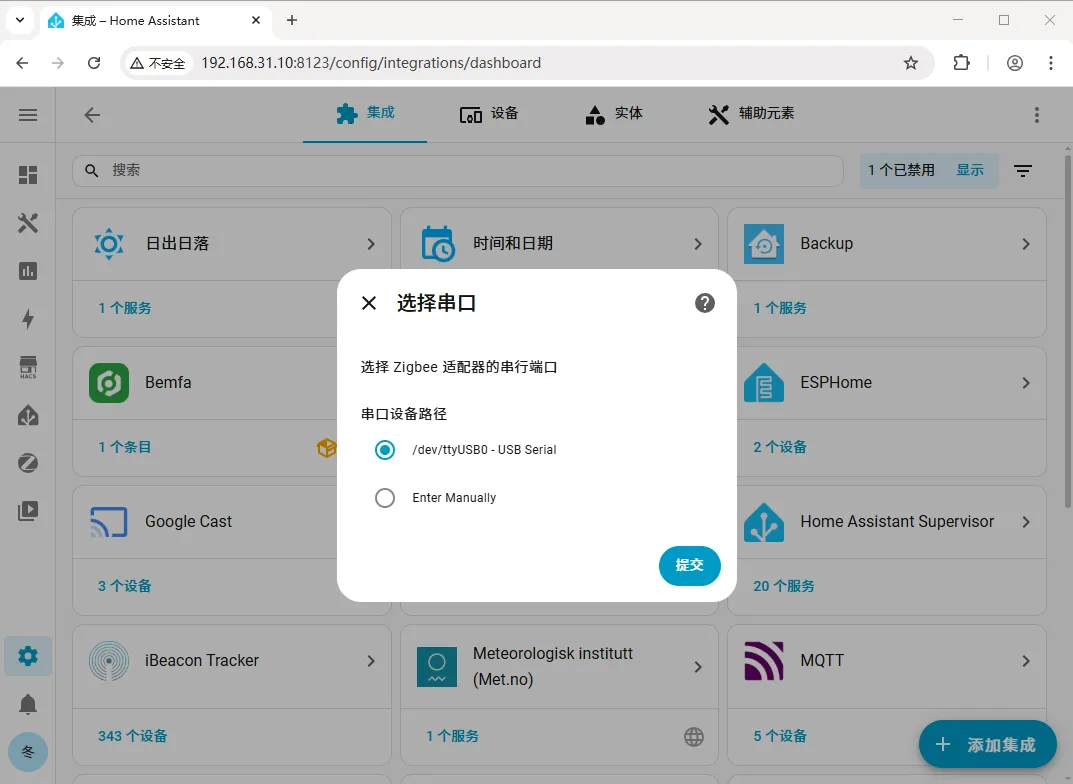
Section titled “Step 3: Select the coordinator port”Select the ttyUSBx you just found, then click Submit.
Step 4: Choose automatic setup
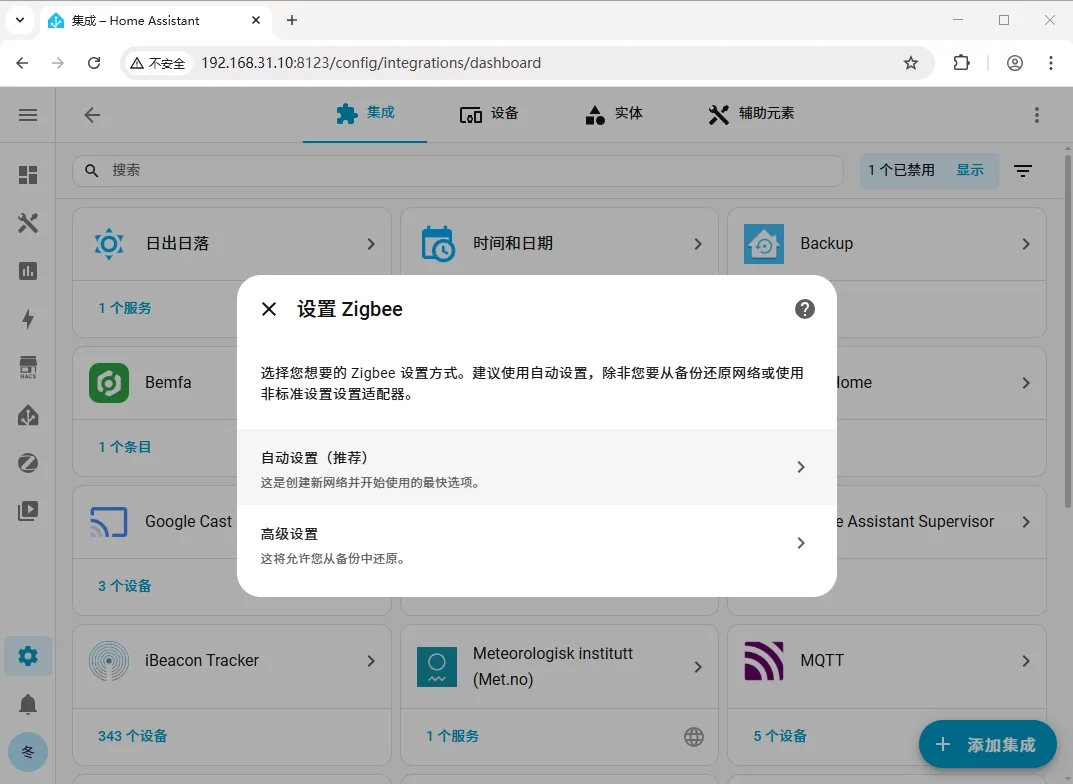
Section titled “Step 4: Choose automatic setup”For the setup method, choose Automatic setup.
Step 5: Wait for the new network to form
Section titled “Step 5: Wait for the new network to form”The integration starts forming a new network (this takes about 3-5 minutes — do not close the page). Just wait patiently.
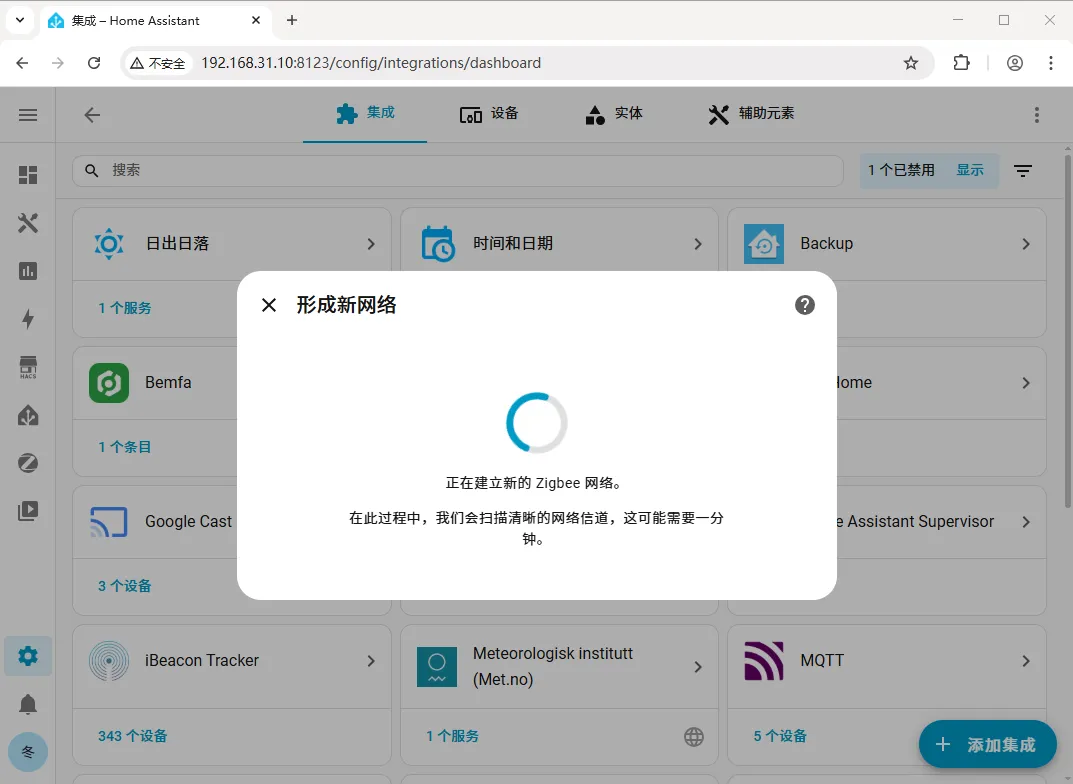
Step 6: Finish installing the integration
Section titled “Step 6: Finish installing the integration”Once the network is formed, click Skip and finish.
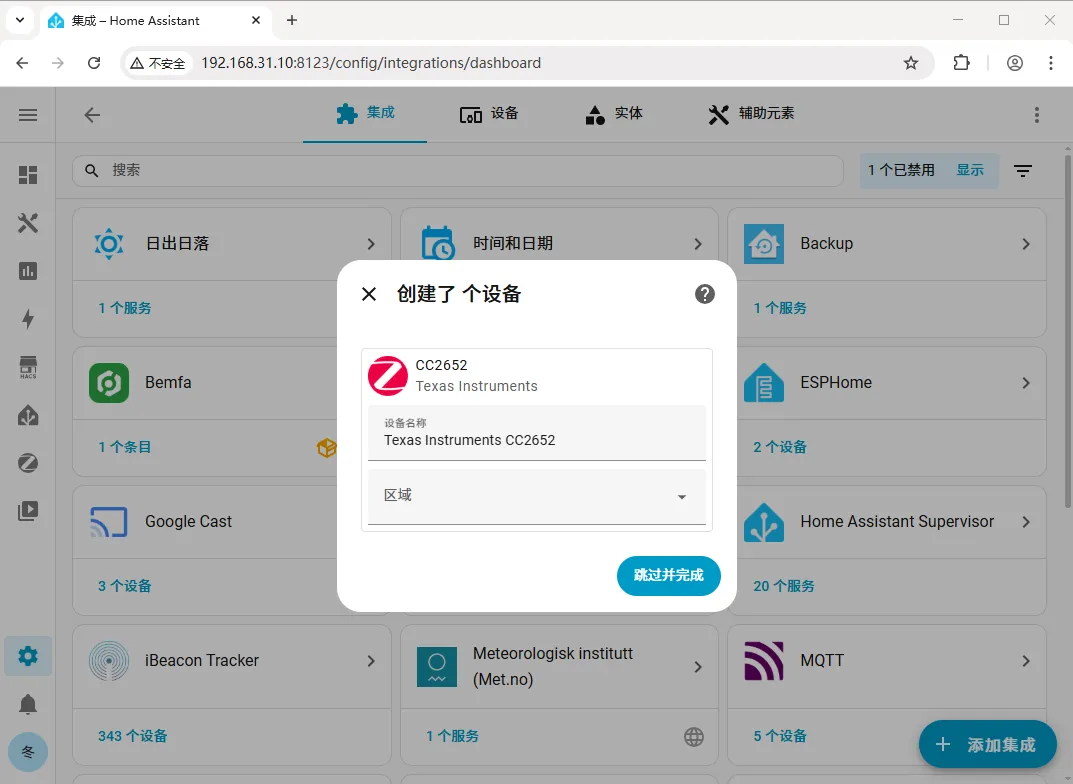
Step 7: Add a Zigbee device
Section titled “Step 7: Add a Zigbee device”Open Zigbee Home Automation and click Add device.
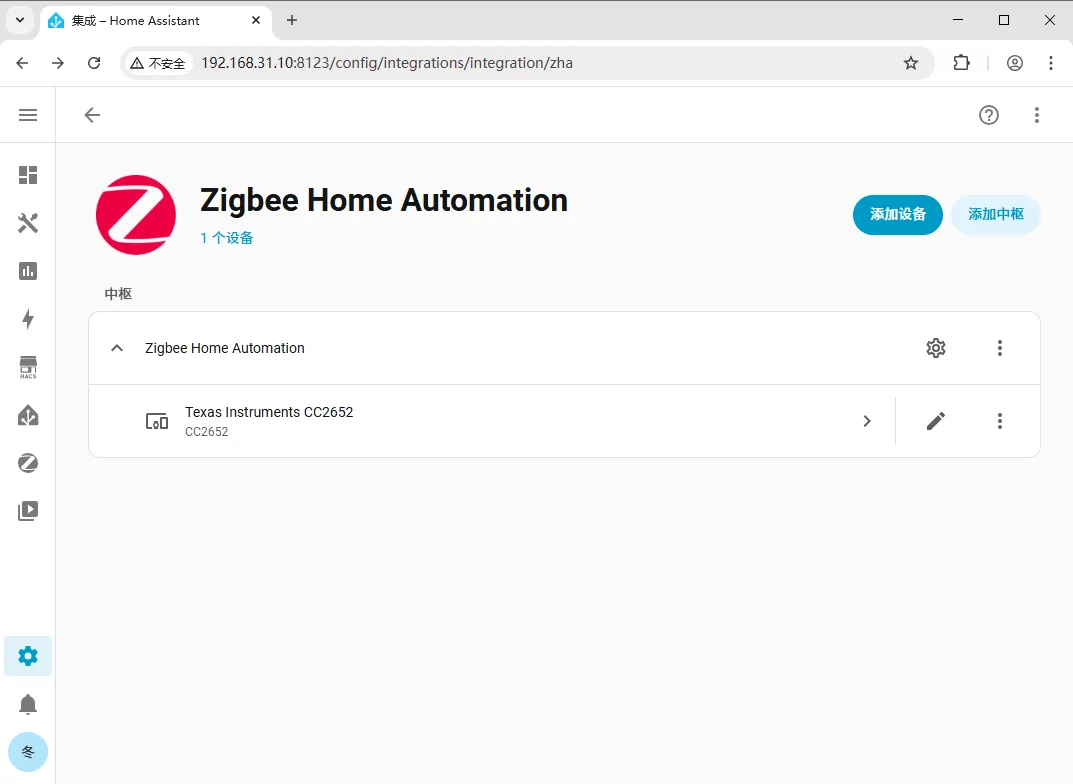
Step 8: Put the device into pairing mode
Section titled “Step 8: Put the device into pairing mode”Once pairing mode is active, put your Zigbee device into pairing mode.
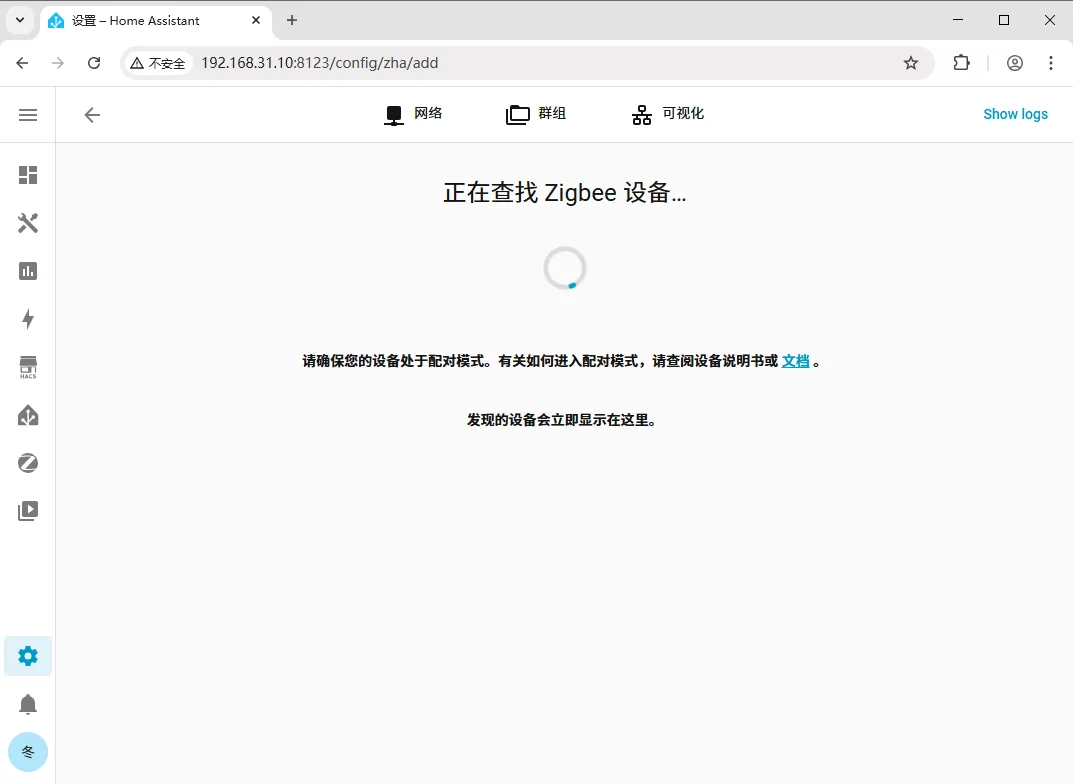
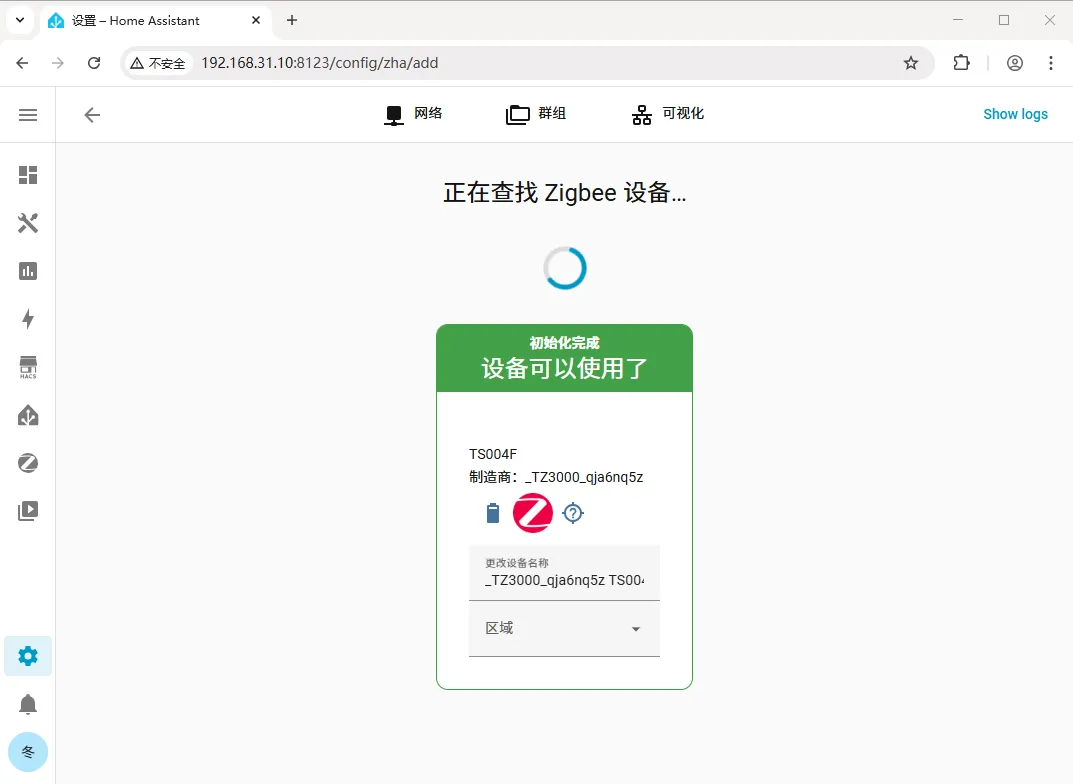
Step 9: Wait for initialization to complete
Section titled “Step 9: Wait for initialization to complete”When the page shows Initialization complete, the device has been added successfully.
| Problem | Solution |
|---|---|
| Can ZHA and Z2M be used at the same time? | No, they cannot be used at the same time — unless you have 2 coordinators. |
| How to choose between ZHA and Z2M? | Z2M is recommended — it supports more devices and gets more timely updates; ZHA is the official integration and simple to configure, but its supported device library is smaller. |
| Can’t find the coordinator in the hardware list | Confirm the coordinator is plugged in properly; with no other USB devices plugged in, the ttyUSBx entry in the list is the coordinator. |
| Network formation keeps spinning | Forming a new network takes about 3-5 minutes — do not close the page; just wait patiently. |
Summary
Section titled “Summary”The core flow for configuring ZHA is: find the coordinator’s serial port → add the ZHA integration → select the port and choose automatic setup → wait for the network to form → finish → add and pair Zigbee devices. Remember that ZHA and Z2M cannot run on the same coordinator at the same time.