

Midea Device Integration Guide
This guide explains how to connect Midea smart devices to Home Assistant. Two integrations are commonly used: Midea AC LAN (local LAN access, mainly for air conditioners) and Midea Auto Cloud (cloud access, supporting more device types). Use either one, or both, as needed.
Version Info
Section titled “Version Info”| Name | OS | Core | Midea AC LAN | Midea Auto Cloud |
|---|---|---|---|---|
| Version | 17.0 | 2025.2.1 | 0.6.10 | 0.2.6 |
Prerequisites
Section titled “Prerequisites”Before you start, make sure:
- Your Home Assistant is up and running, and you can access its dashboard.
- Your devices are added to the Midea Home app, and the HA box, your computer, and the devices are all on the same LAN. For details, see Smart Device Network Setup.
- HACS is installed (needed to download the Midea Auto Cloud integration).
Tip: Donggua HAOS ships with HACS pre-installed; if you need to update it, follow HACS Turbo.
Option 1: Midea AC LAN (local LAN access)
Section titled “Option 1: Midea AC LAN (local LAN access)”Step 1: Add the midea integration
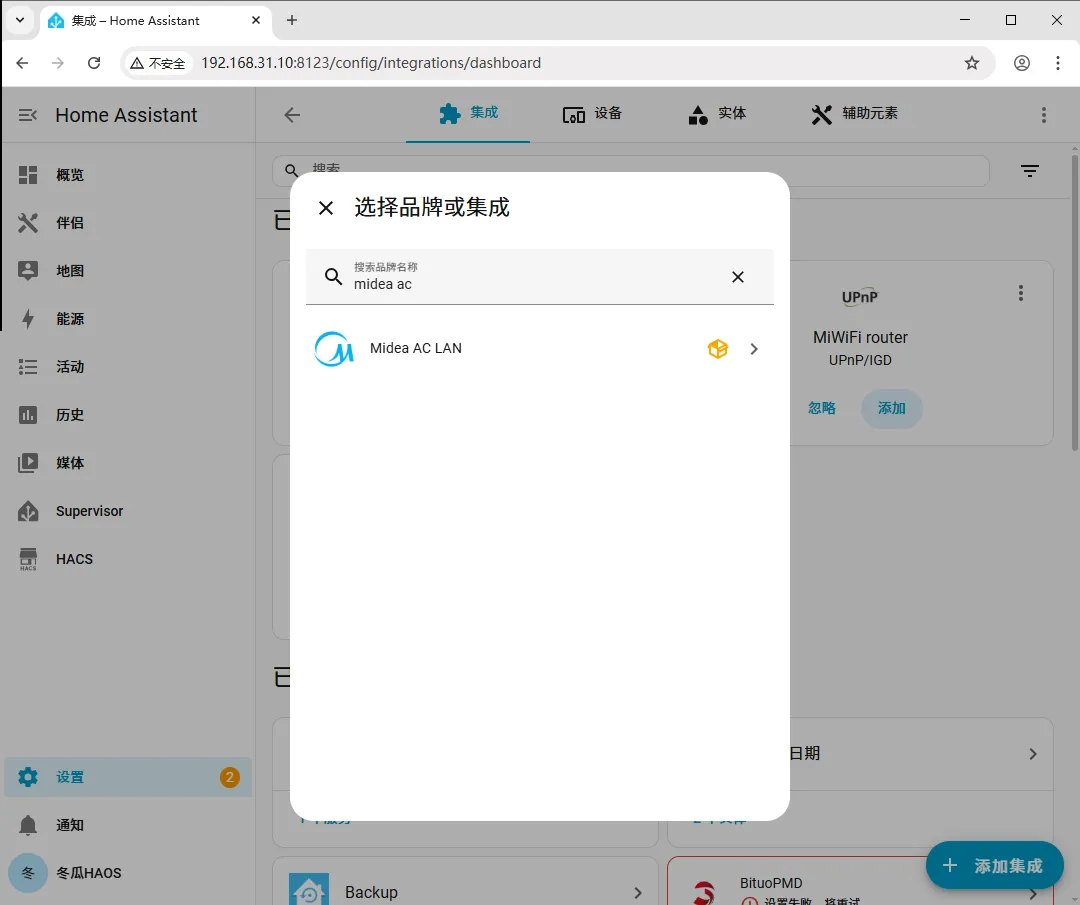
Section titled “Step 1: Add the midea integration”Go to Settings > Devices & Services > Integrations > Add Integration > search for midea.
Step 2: Choose automatic discovery
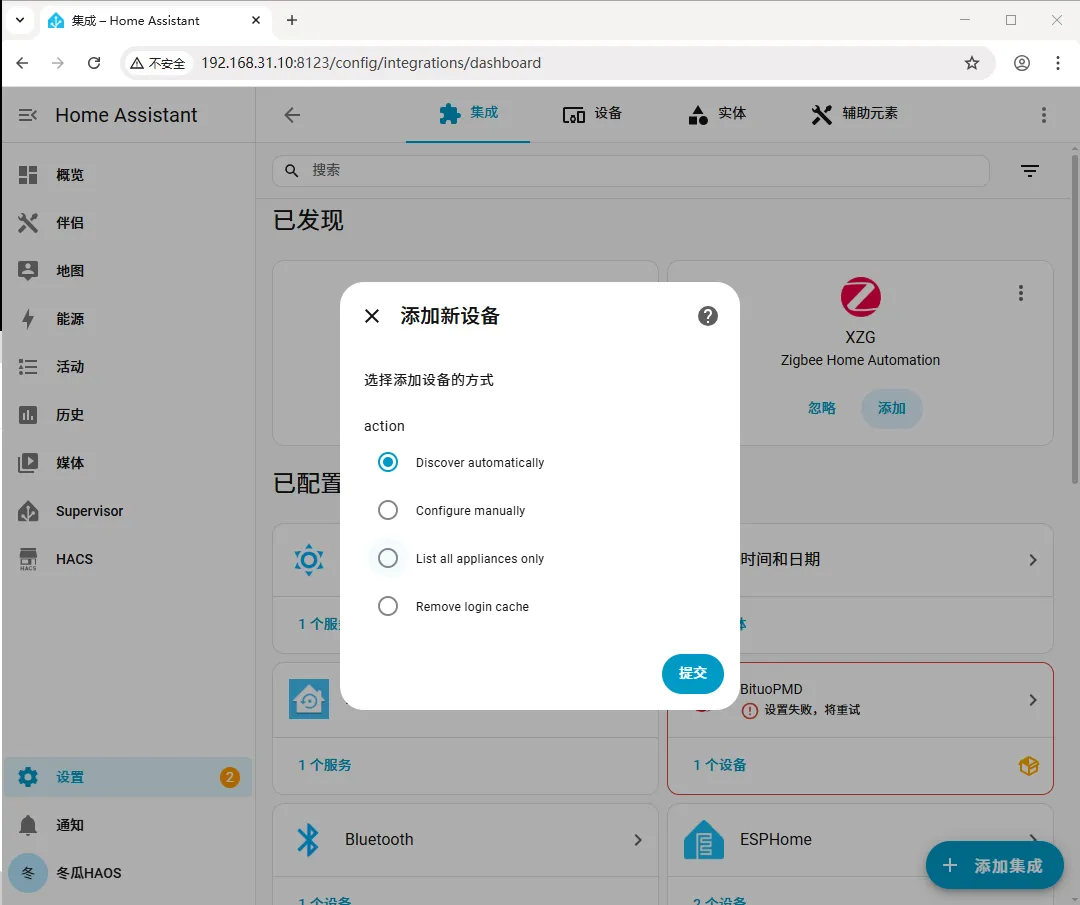
Section titled “Step 2: Choose automatic discovery”Select Discover automatically and click Submit.
Step 3: Confirm the IP address
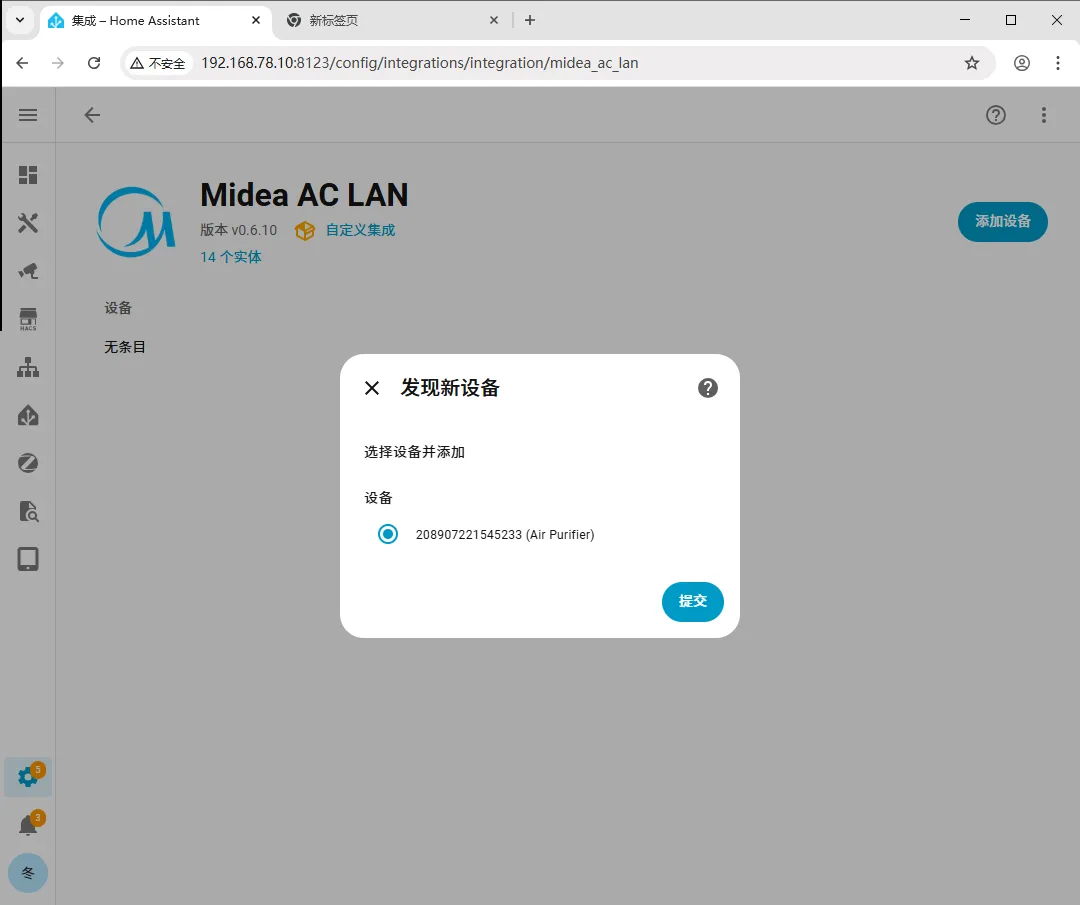
Section titled “Step 3: Confirm the IP address”Keep the default IP address and click Submit. If no devices are found, look up the device’s IP address in the Midea Home app, enter it in the field, then click Submit.
Step 4: Log in and submit device parameters
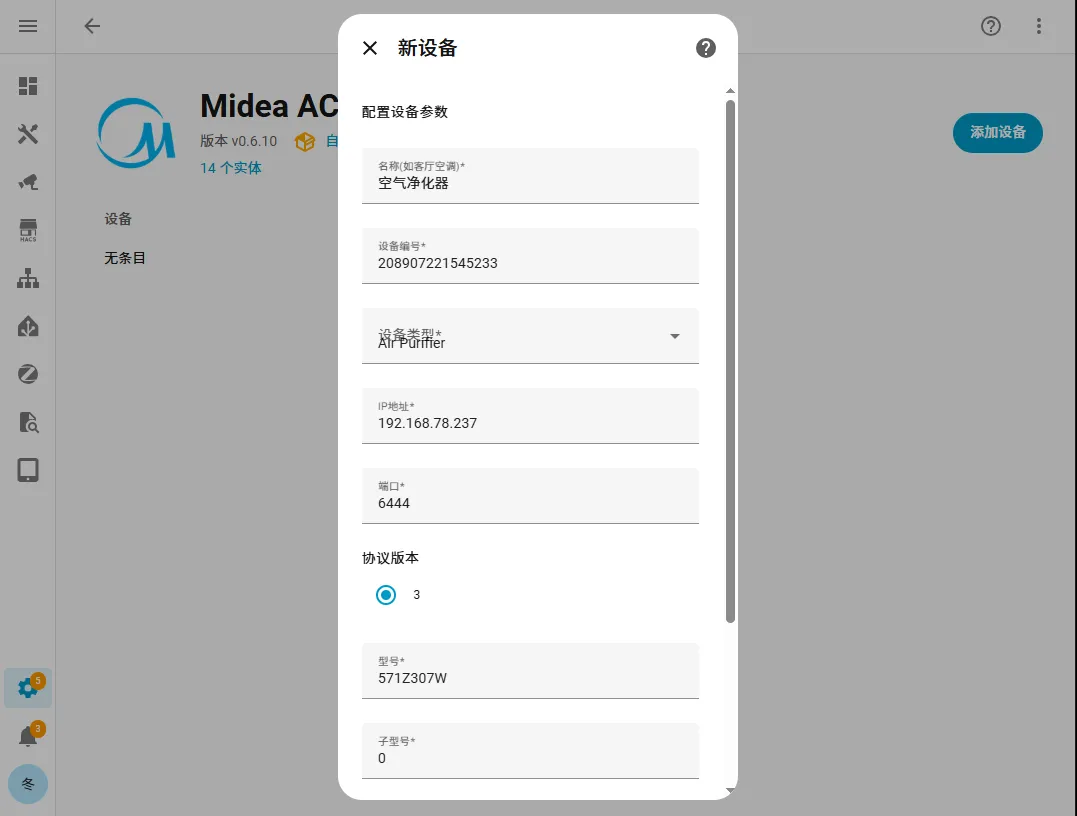
Section titled “Step 4: Log in and submit device parameters”Enter your Midea Home account and password. You will be taken to the Configure device parameters screen — no changes needed there; scroll down and click Submit.
Step 5: Enable extended sensors and extended controls
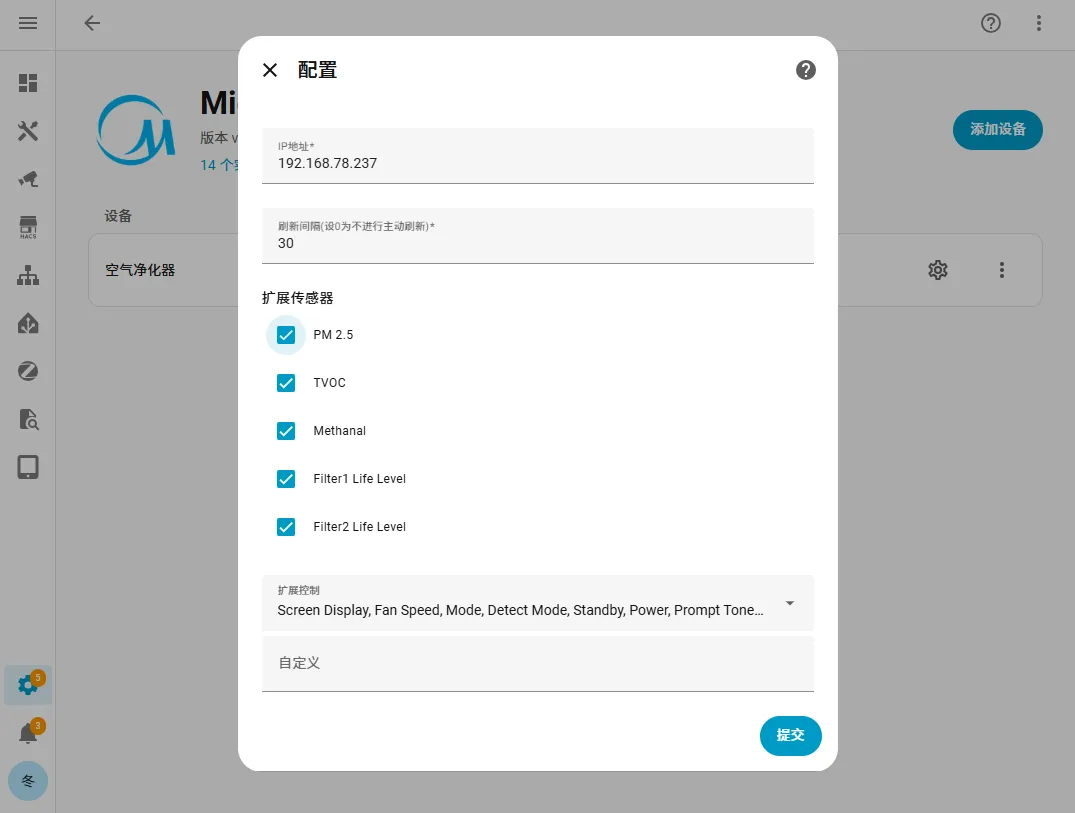
Section titled “Step 5: Enable extended sensors and extended controls”Click the ⚙ next to the newly added device, check all of Extended sensors and Extended controls, then click Submit.
Option 2: Midea Auto Cloud (cloud access)
Section titled “Option 2: Midea Auto Cloud (cloud access)”Step 1: Search for Midea Auto Cloud
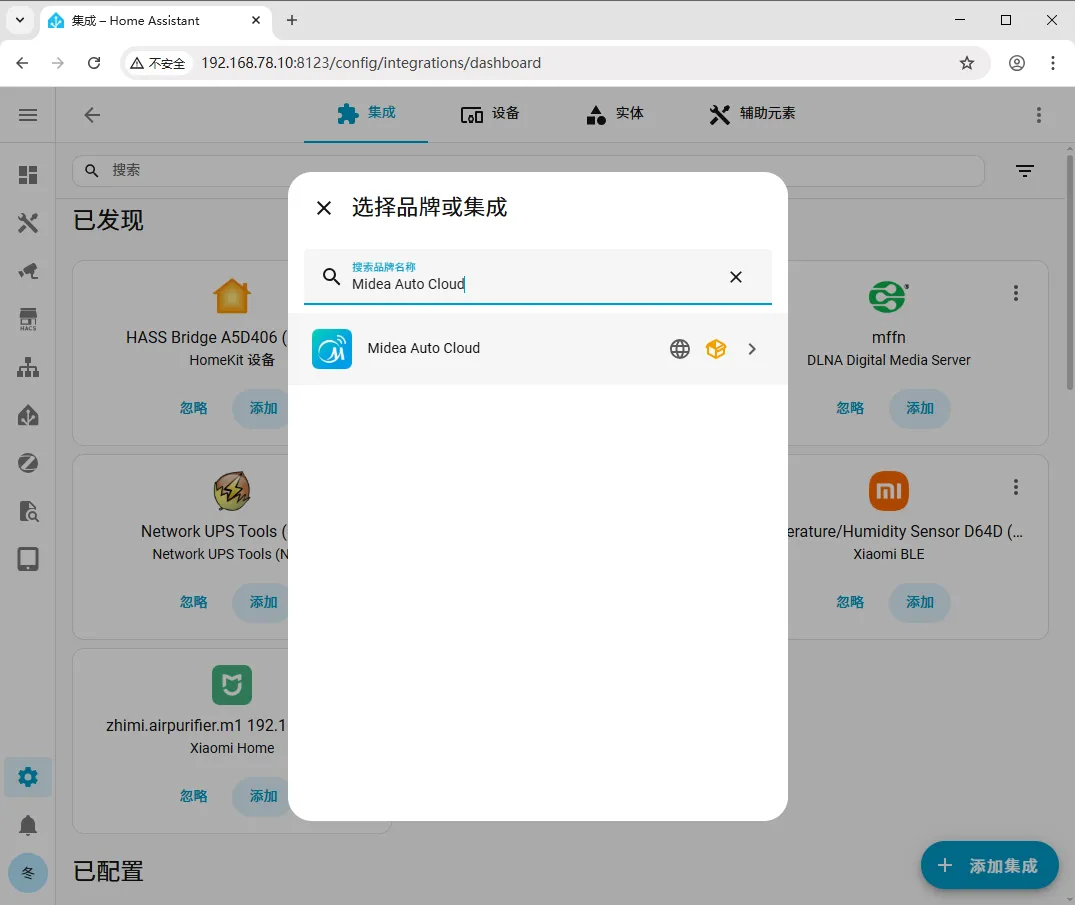
Section titled “Step 1: Search for Midea Auto Cloud”Go to Settings > Devices & Services > Integrations > Add Integration > search for Midea Auto Cloud.
Step 2: Download the integration from HACS
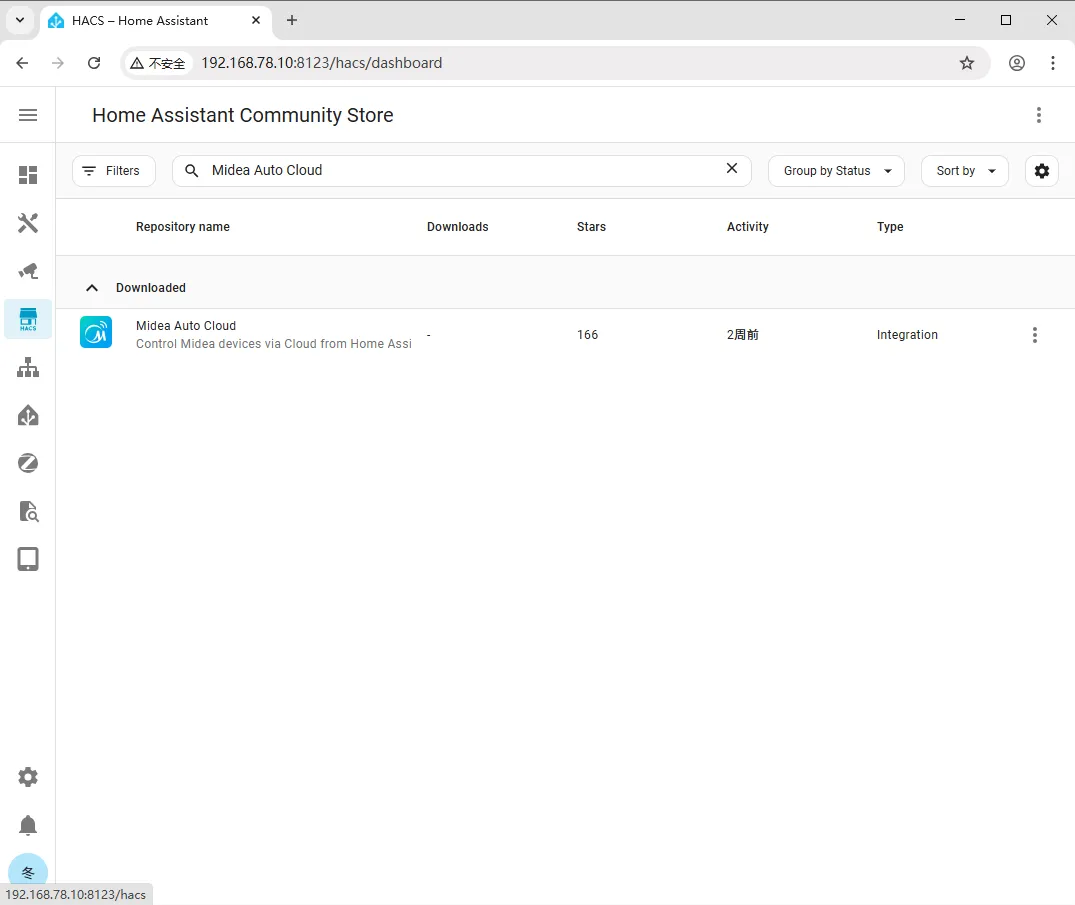
Section titled “Step 2: Download the integration from HACS”If the integration isn’t there, open HACS, search for and download Midea Auto Cloud.
Step 3: Go back and search in Integrations
Section titled “Step 3: Go back and search in Integrations”Go back to Integrations and search for Midea Auto Cloud.
Step 4: Log in and add a home
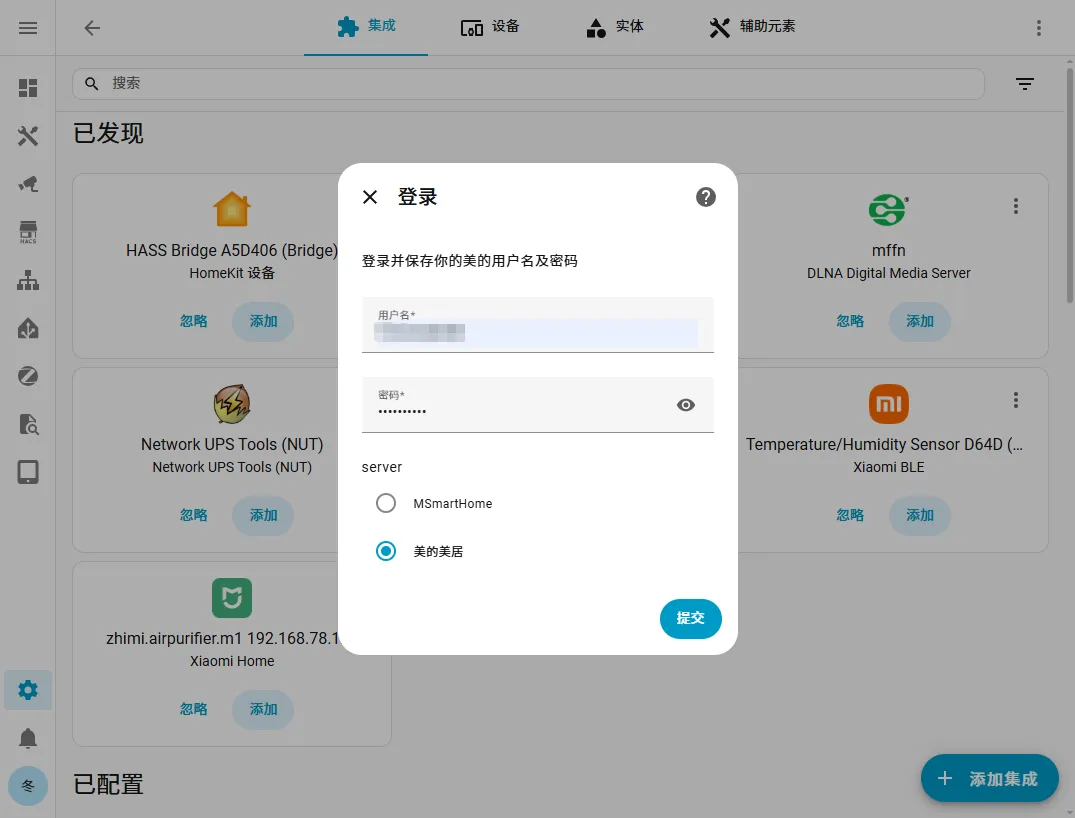
Section titled “Step 4: Log in and add a home”Log in with your account and password, select Add home, and click Submit.
| Problem | Solution |
|---|---|
| Midea AC LAN can’t find any devices | Look up the device’s IP address in the Midea Home app, then enter it manually in the field and submit. |
| Can’t find the Midea Auto Cloud integration | Open HACS, search for and download Midea Auto Cloud, then go back to Integrations to search and add it. |
| Device features are incomplete or unsupported | Report it to the author on the forum or GitHub. |
Summary
Section titled “Summary”For Midea devices you can pick either integration, or use both: Midea AC LAN works over the LAN (search midea → auto discovery → confirm IP → log in → enable extended sensors/controls), while Midea Auto Cloud works via the cloud (download the integration from HACS if needed → log in → add a home). If a device isn’t supported, report it to the author on the forum or GitHub.