

Install the seenzus MQTT Bridge with HACS
This page provides two fallback methods when one-click installation does not work.
The custom repository below is the bridge’s public release repo, walllbf/seenzus-mqtt-bridge — not the monorepo. Use exactly this owner/repo.
Method 1 — Add it manually in HACS
Section titled “Method 1 — Add it manually in HACS”Step 1: Open Custom repositories
Section titled “Step 1: Open Custom repositories”Open HACS → the top-right ⋮ (three-dot) menu → Custom repositories. Enter the repository URL below (hover the code block and click the button in its top-right corner to copy it in one click), set Category to Integration, and click Add:
https://github.com/walllbf/seenzus-mqtt-bridge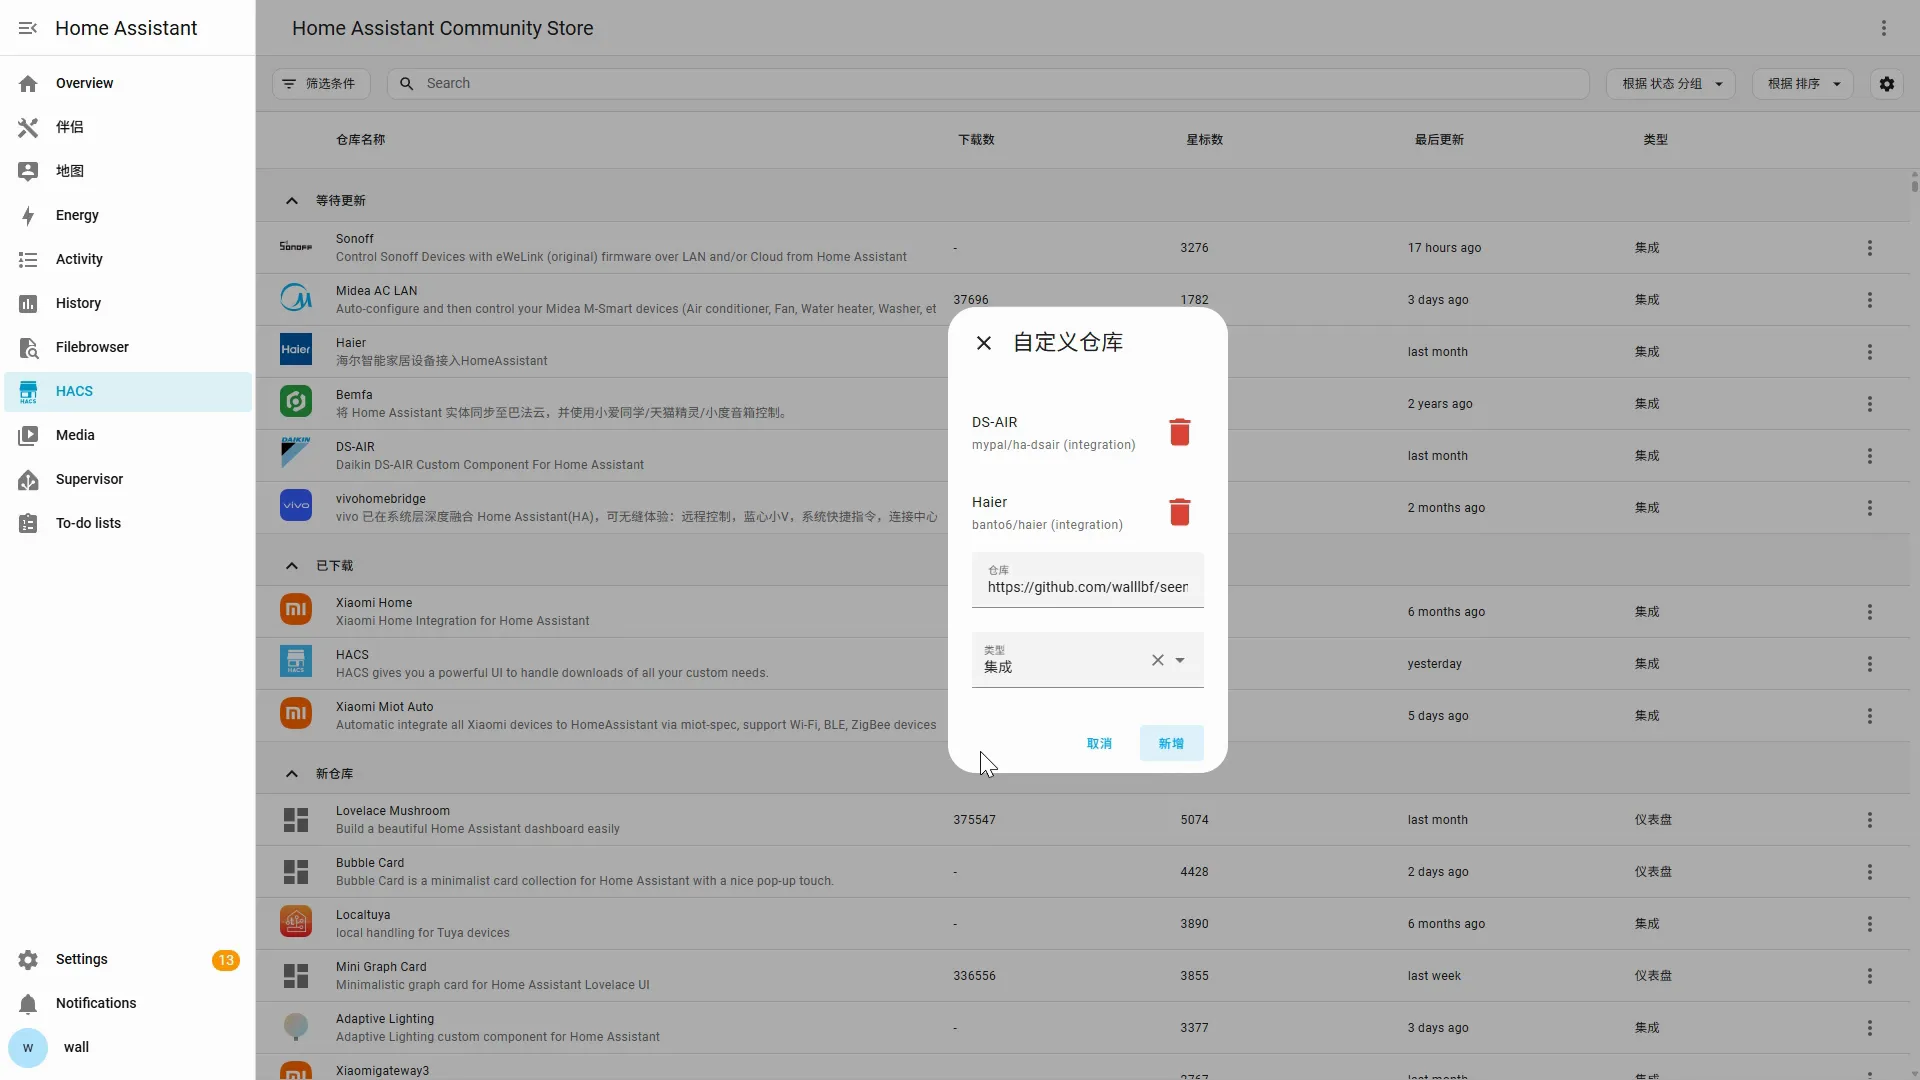
Step 2: Find seenzus MQTT Bridge
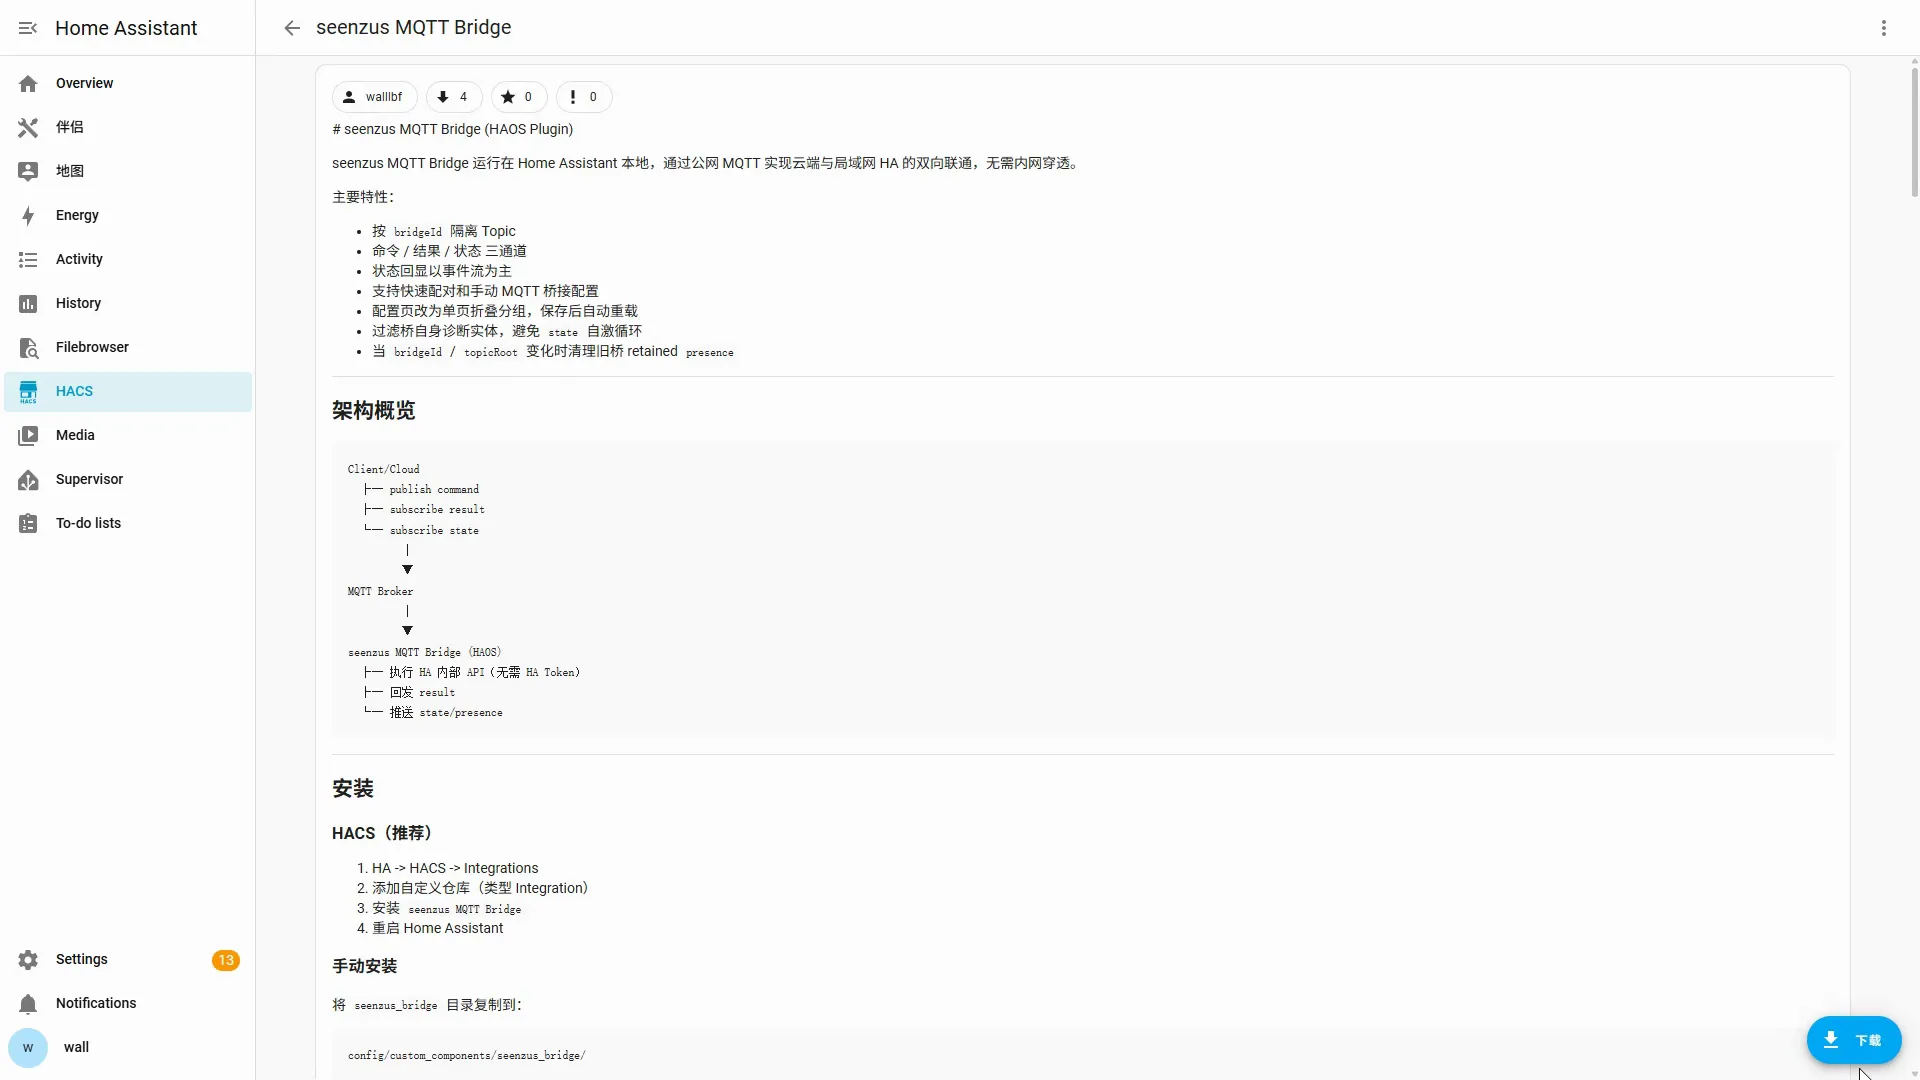
Section titled “Step 2: Find seenzus MQTT Bridge”Back in HACS, search for seenzus MQTT Bridge and open it.
Step 3: Download
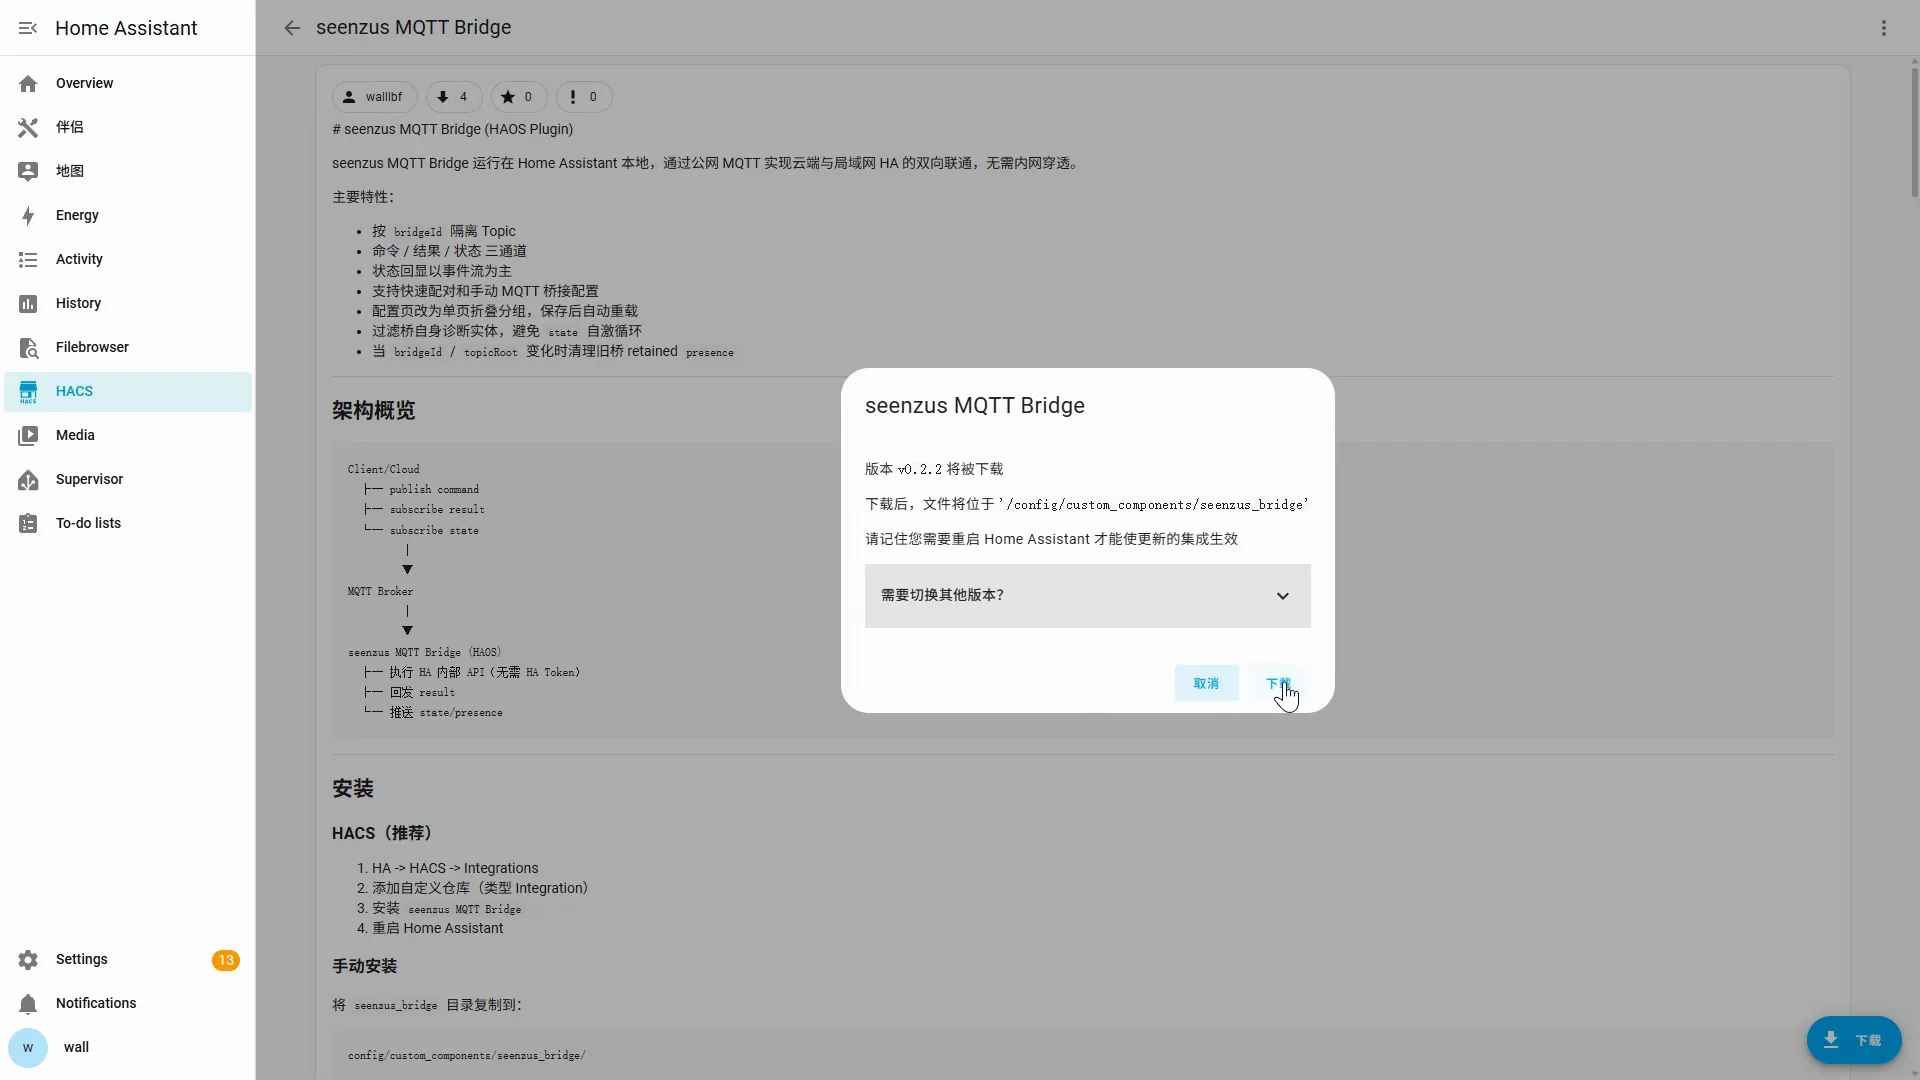
Section titled “Step 3: Download”Click Download, keep the defaults, and confirm.
Method 2 — Manual install with Filebrowser
Section titled “Method 2 — Manual install with Filebrowser”Use this only when Method 1 is unavailable. This route does not receive automatic updates through HACS; future Bridge upgrades require downloading and replacing the files again.
Prerequisite: install and start Filebrowser
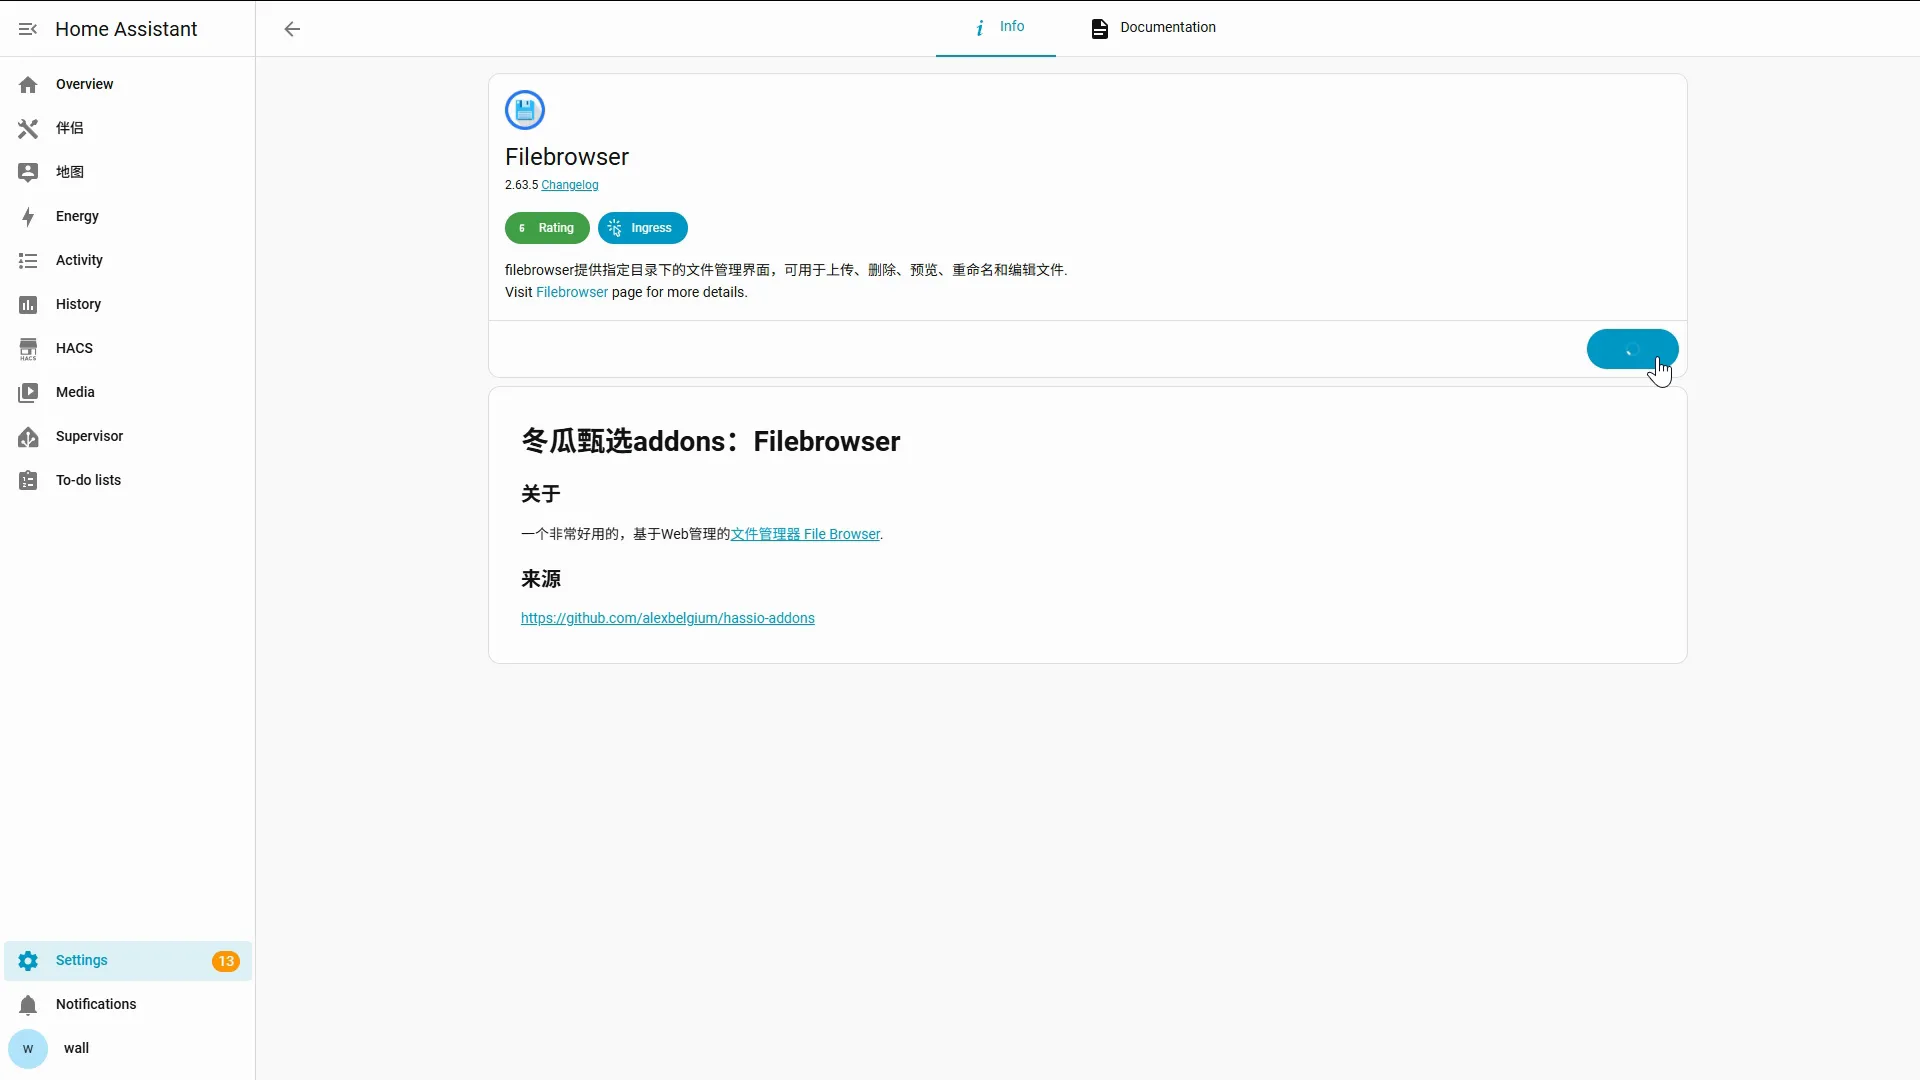
Section titled “Prerequisite: install and start Filebrowser”The recorded manual path uses Filebrowser to access Home Assistant’s /config directory. Open Settings → Apps → Install app, then search for and open Filebrowser.
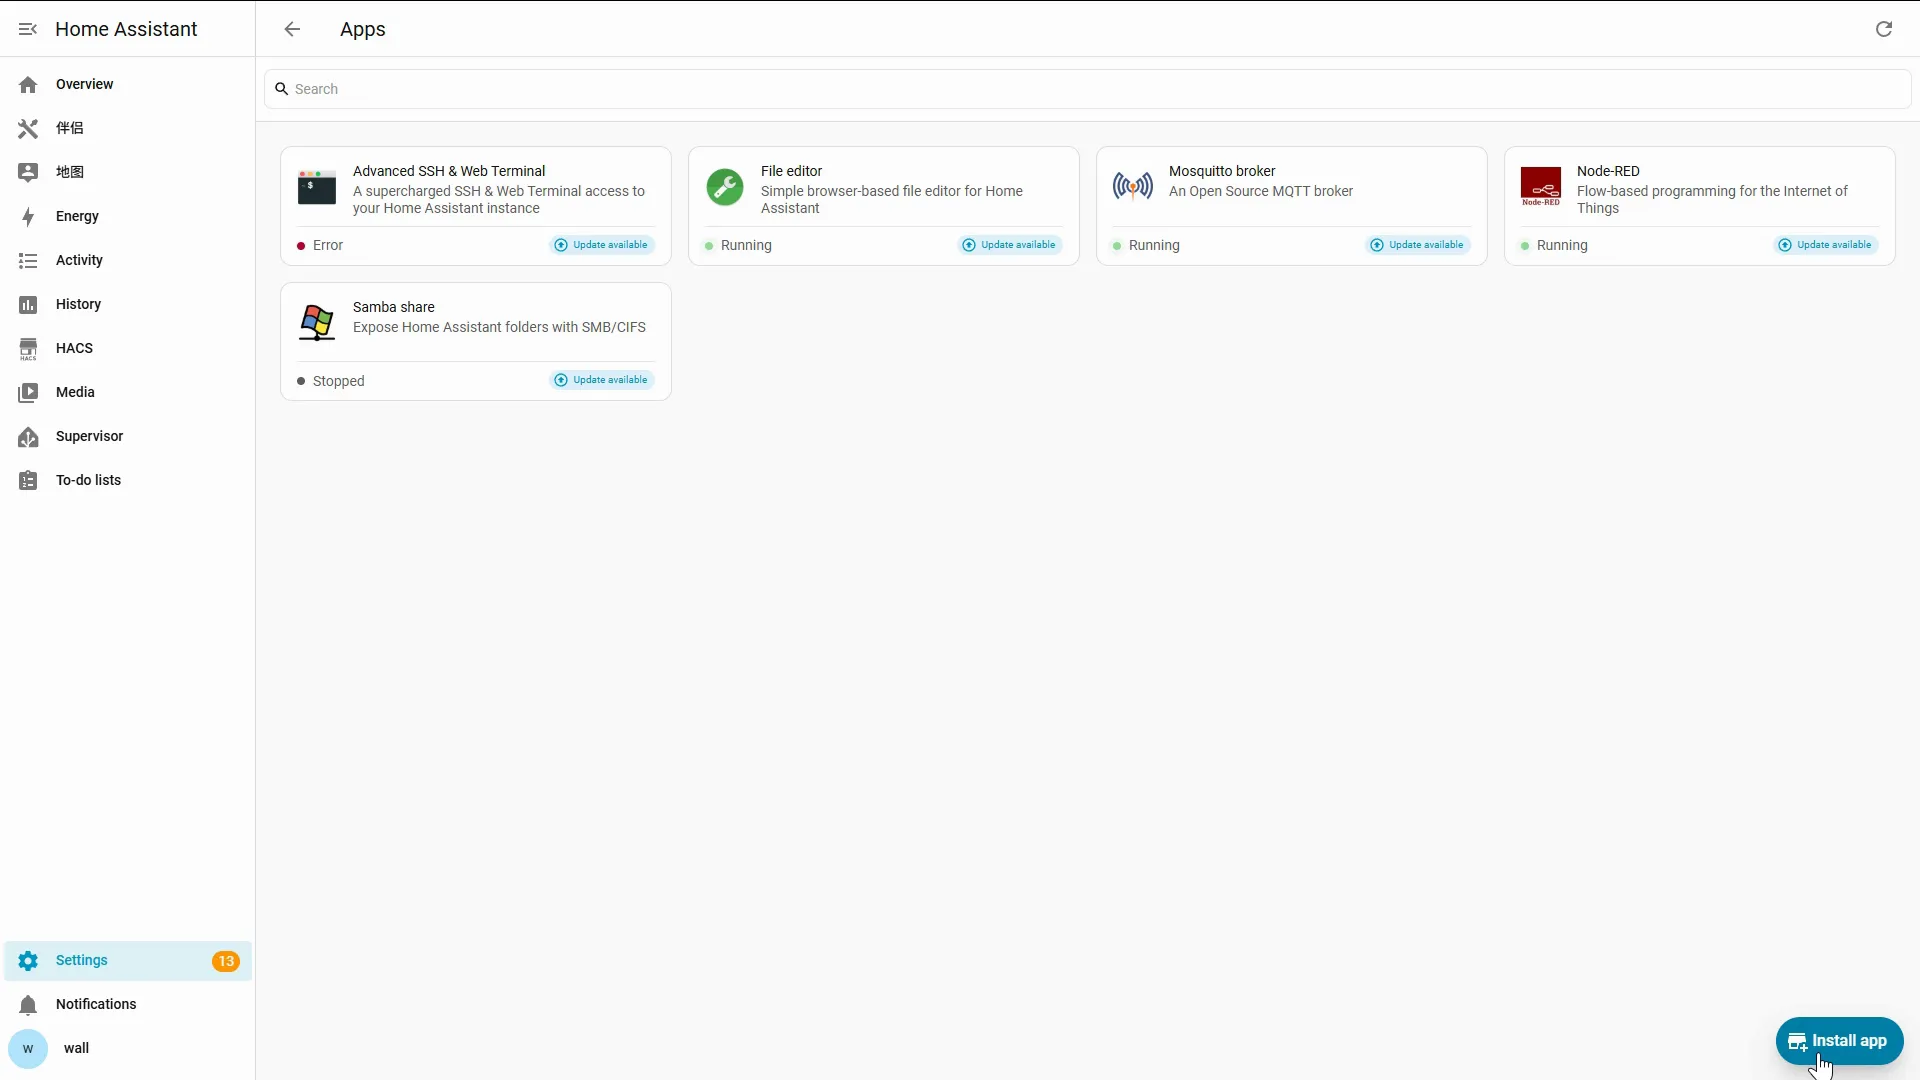
Click Install and wait for installation to finish.
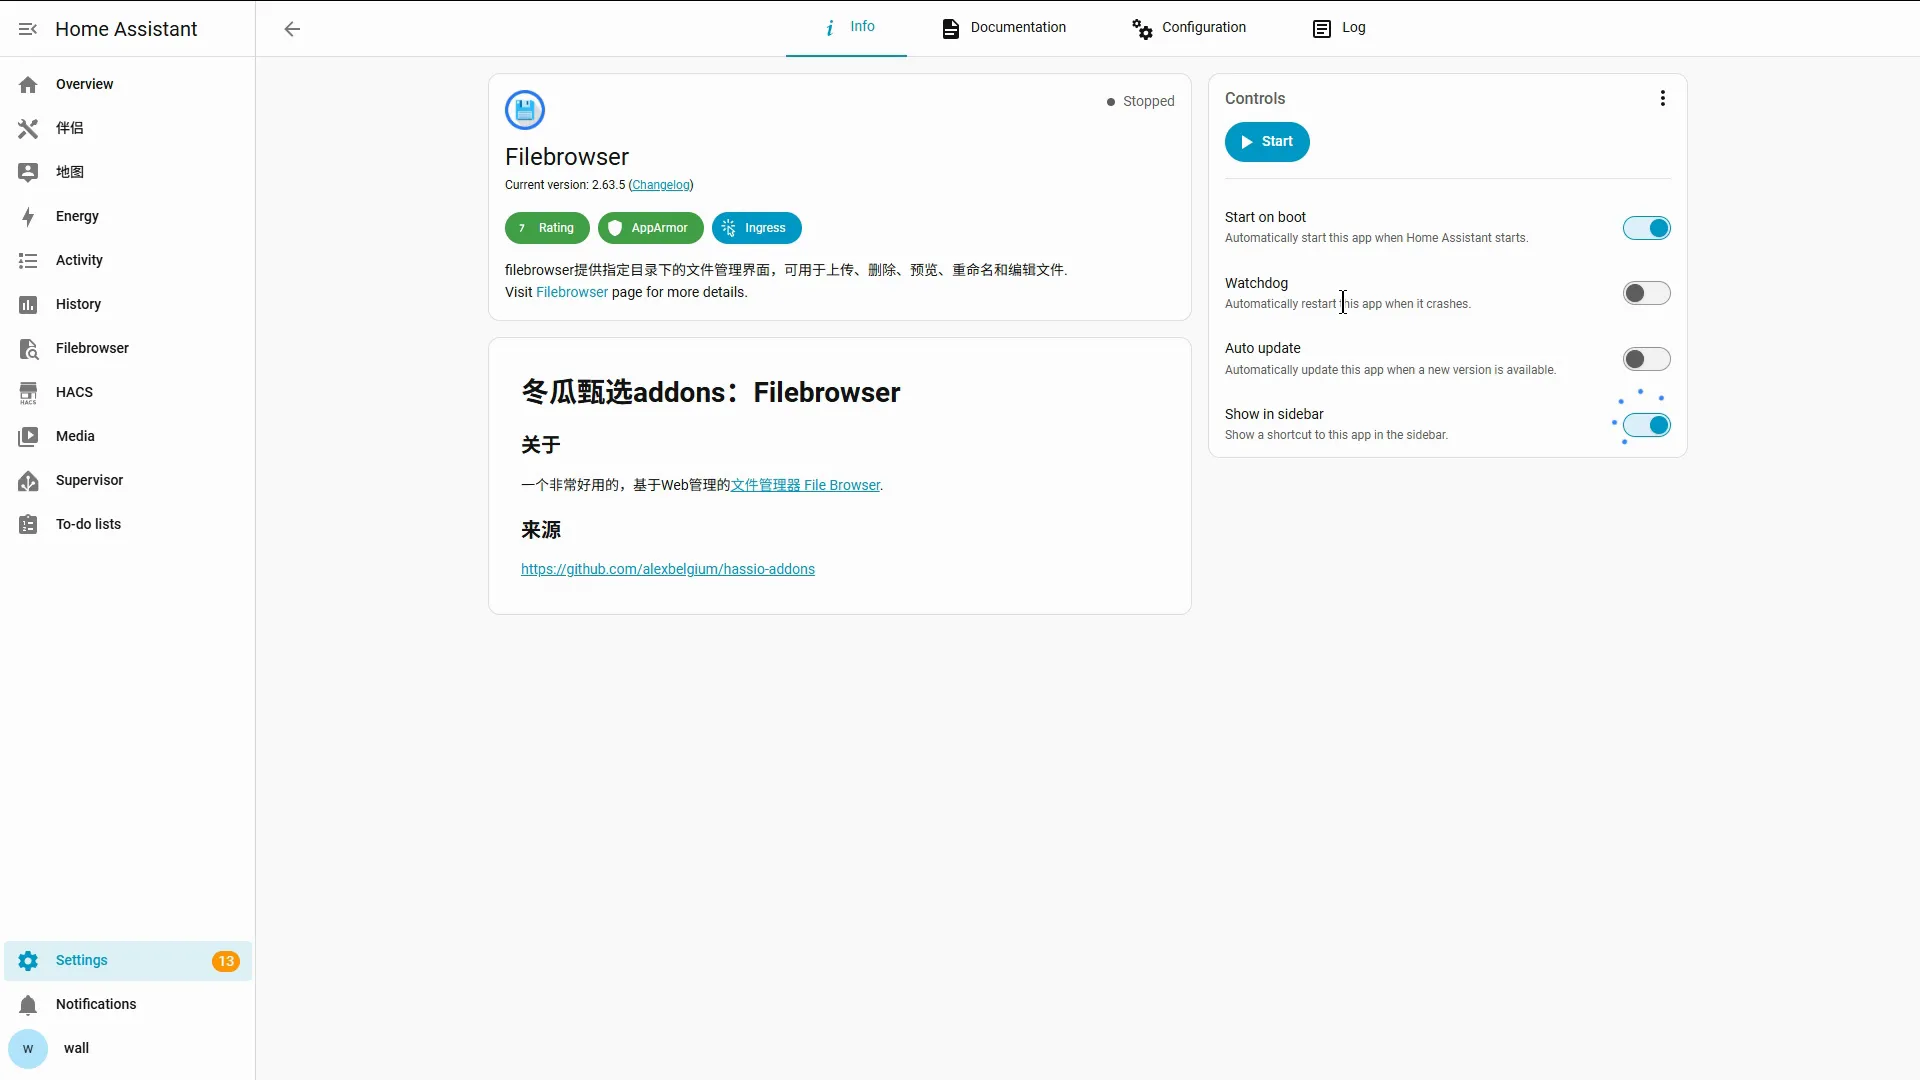
Open Filebrowser’s controls, enable Start on boot and Show in sidebar, then start the app. Continue once Filebrowser appears in the left sidebar.
Install the Bridge manually
Section titled “Install the Bridge manually”-
Open the Bridge’s GitHub Releases and download the release asset named
seenzus_bridge-<version>.zip. Do not use GitHub’s automatically generatedSource codearchives.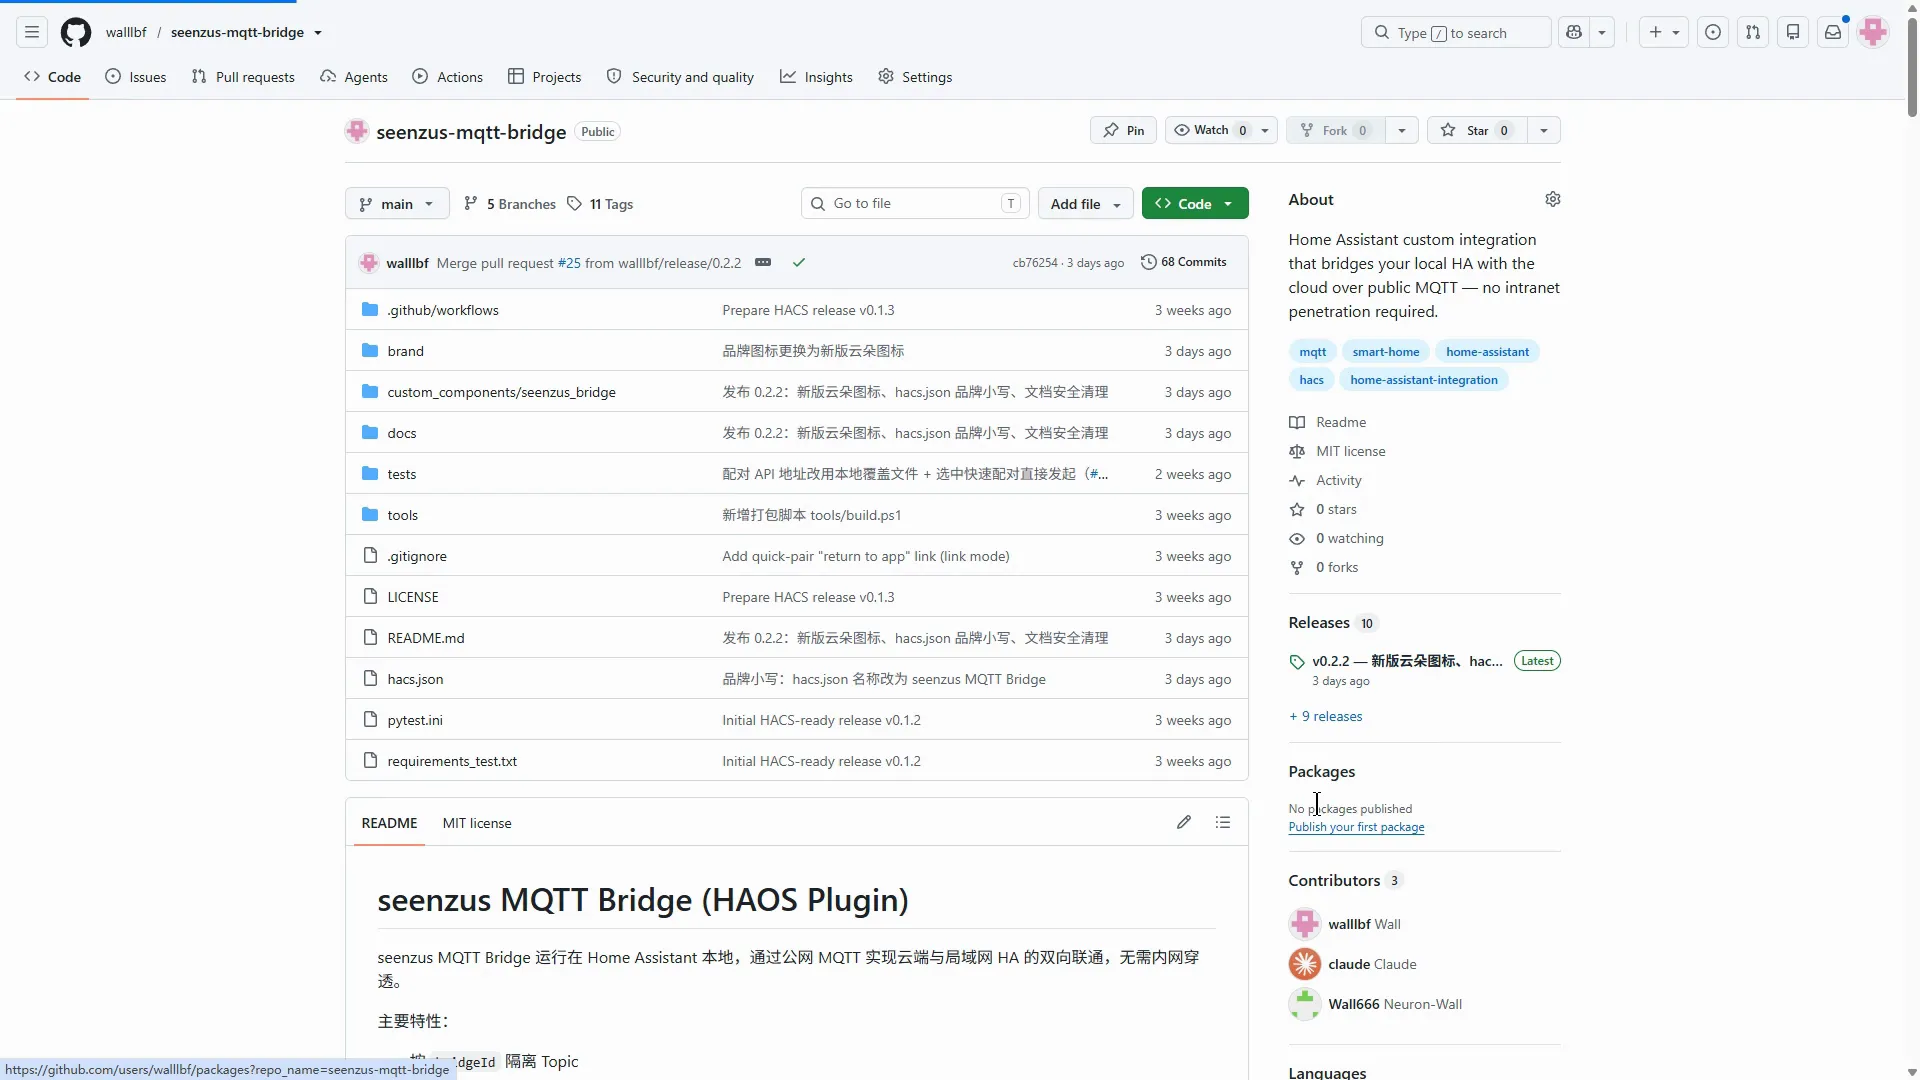
-
Extract the archive on your computer. Open Filebrowser from the Home Assistant sidebar, go to
/config/custom_components/, choose Upload, and select the entire extractedseenzus_bridgefolder.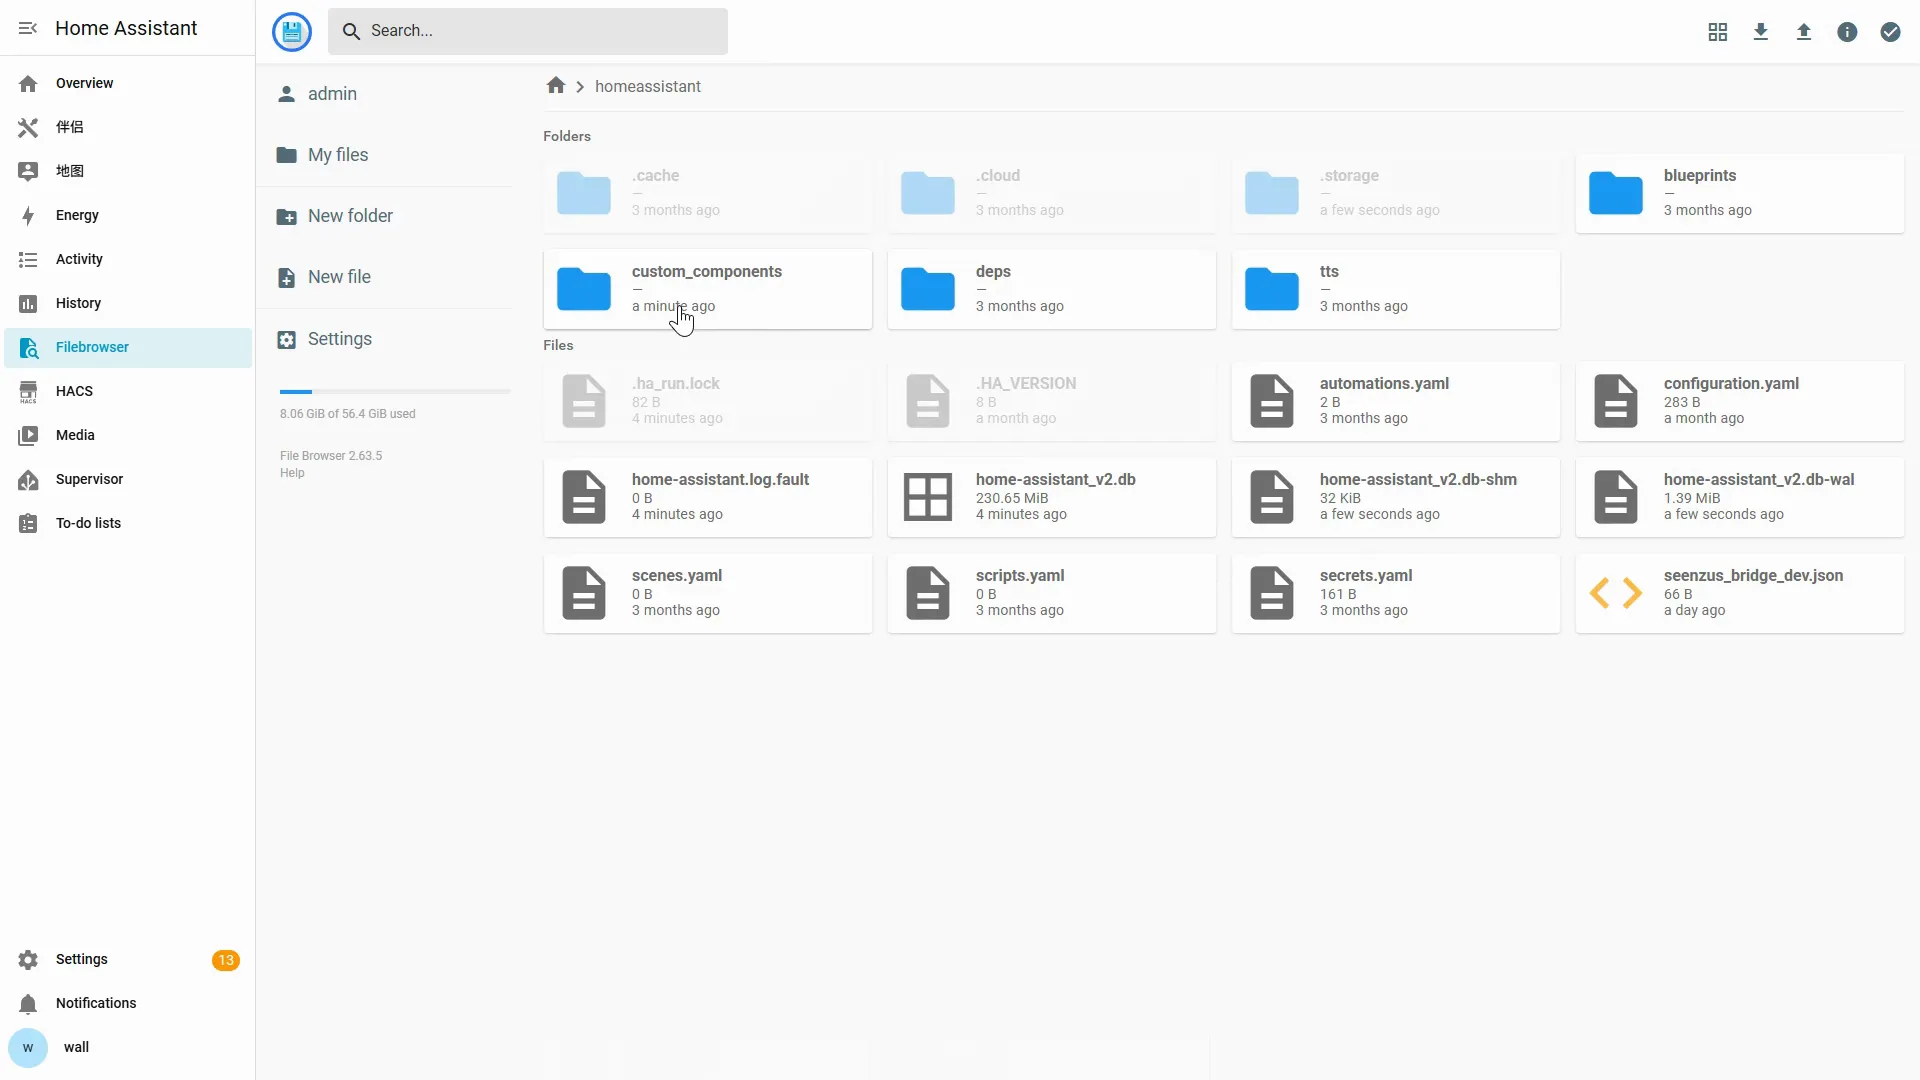
-
When the upload finishes, confirm that the final path is exactly the one below, with no extra nested folder:
/config/custom_components/seenzus_bridge/The folder should directly contain
manifest.json,__init__.py,config_flow.py, and the other integration files.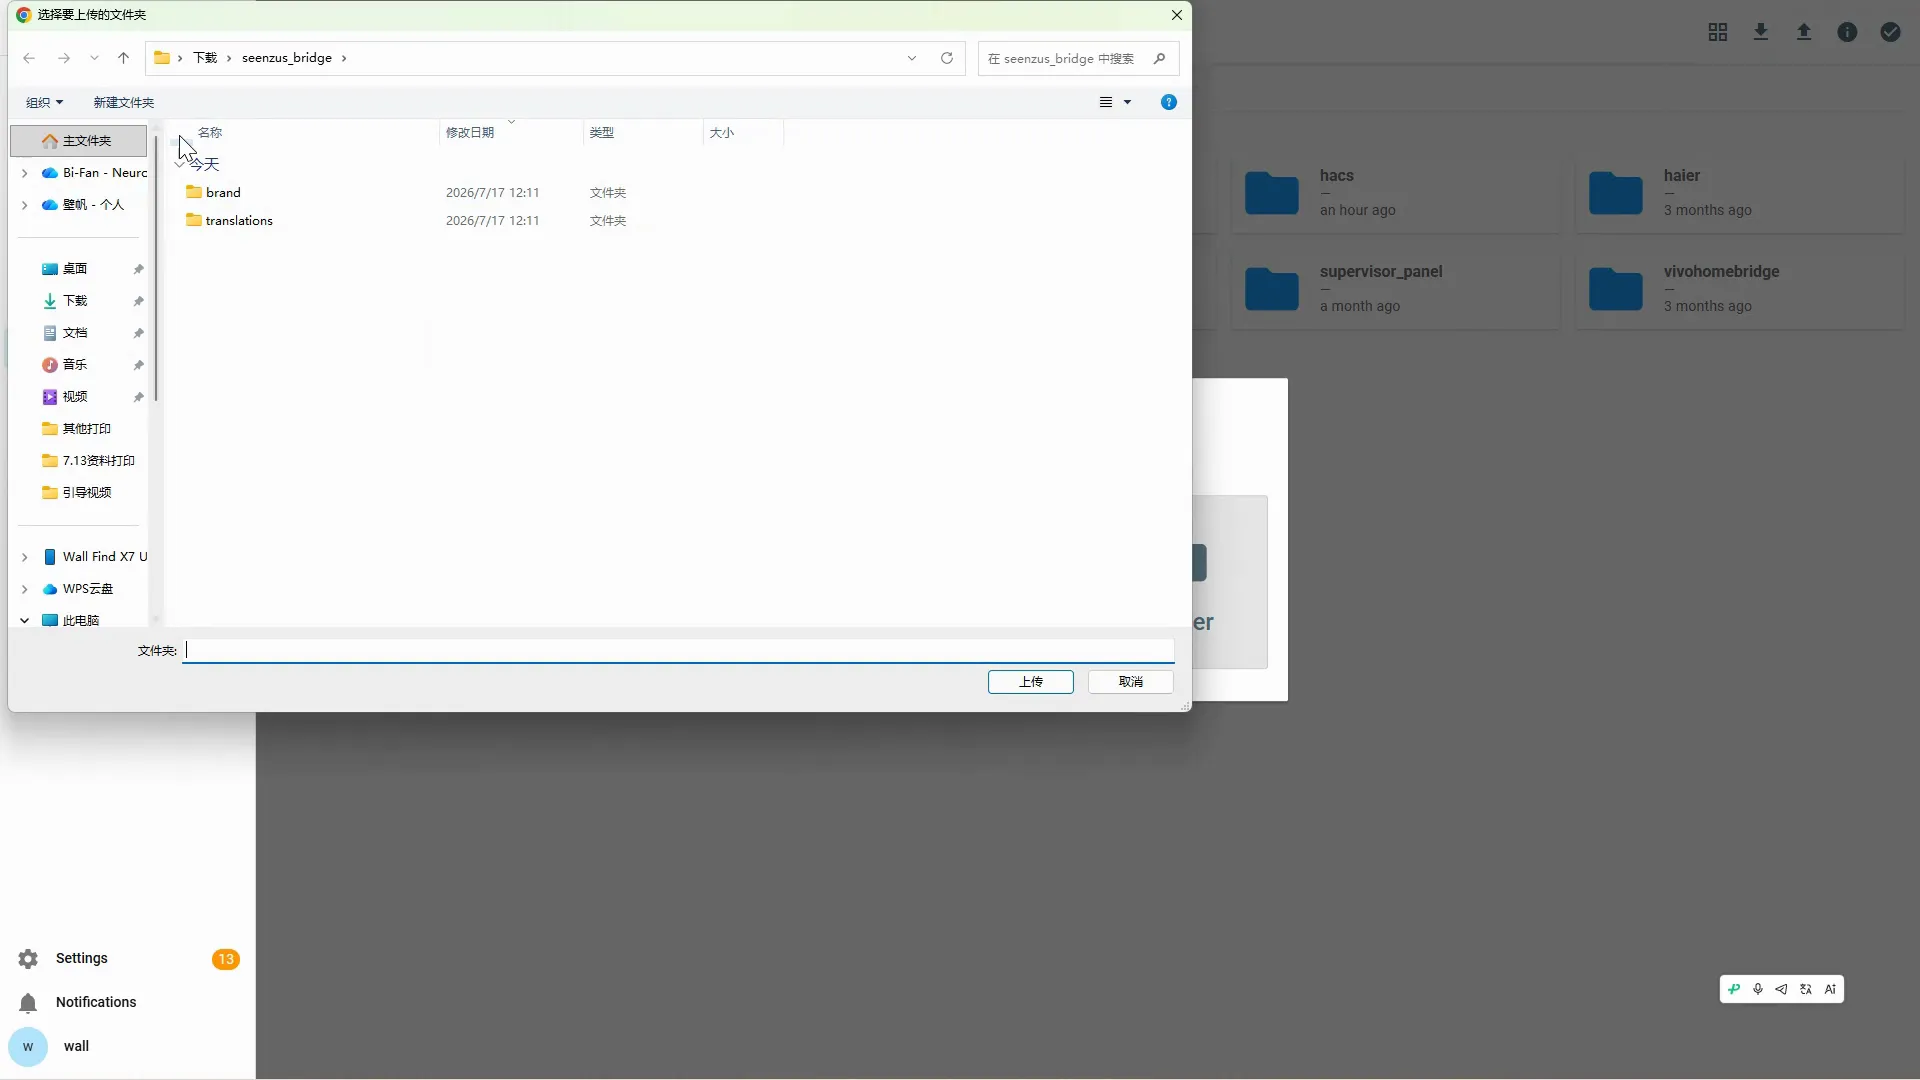
-
Restart Home Assistant using the instructions below.
Where to restart Home Assistant after the download
Section titled “Where to restart Home Assistant after the download”The Bridge only becomes available after Home Assistant restarts. Restart Home Assistant itself—not the browser and not the integration.
- Open Settings, then select Restart required under 1 repair;
- Click Submit and wait for Home Assistant to come back online.
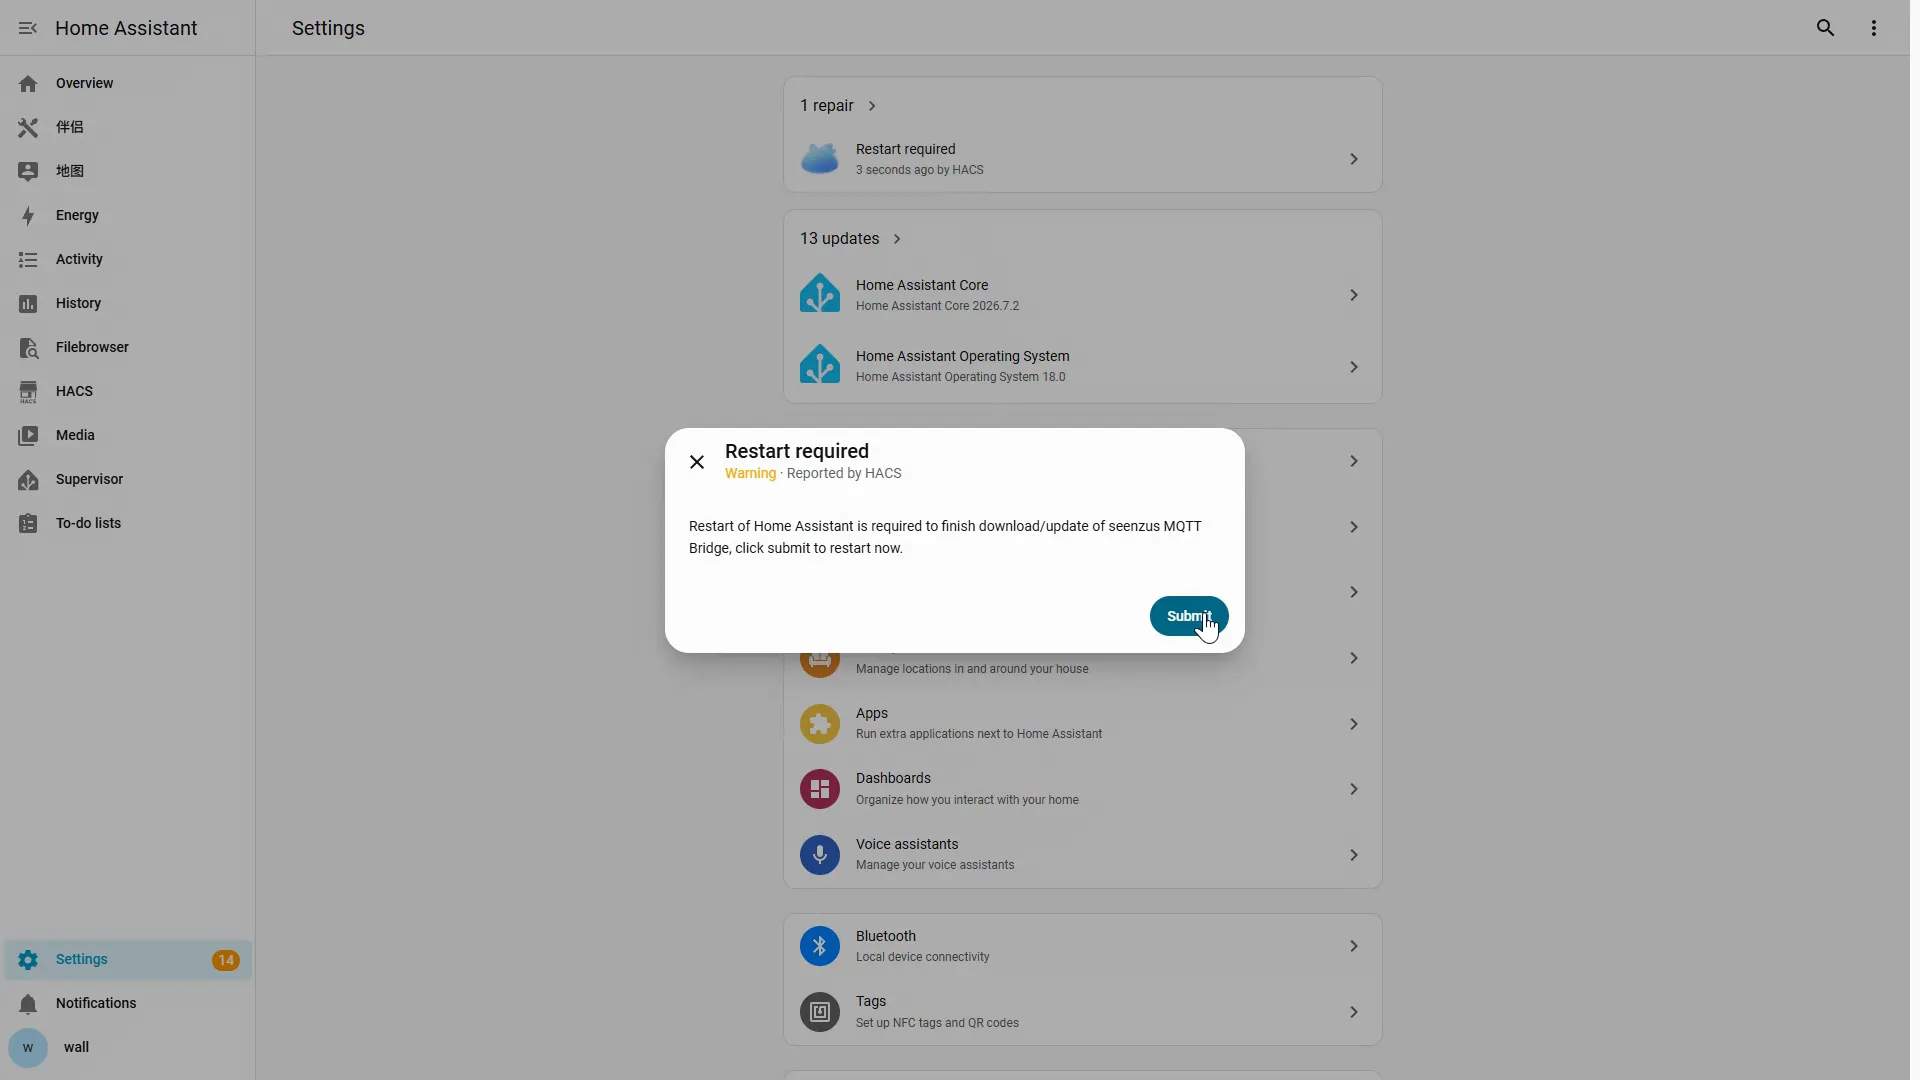
If Restart required is not shown, open Settings → System → power menu → Restart Home Assistant.
Verify the install
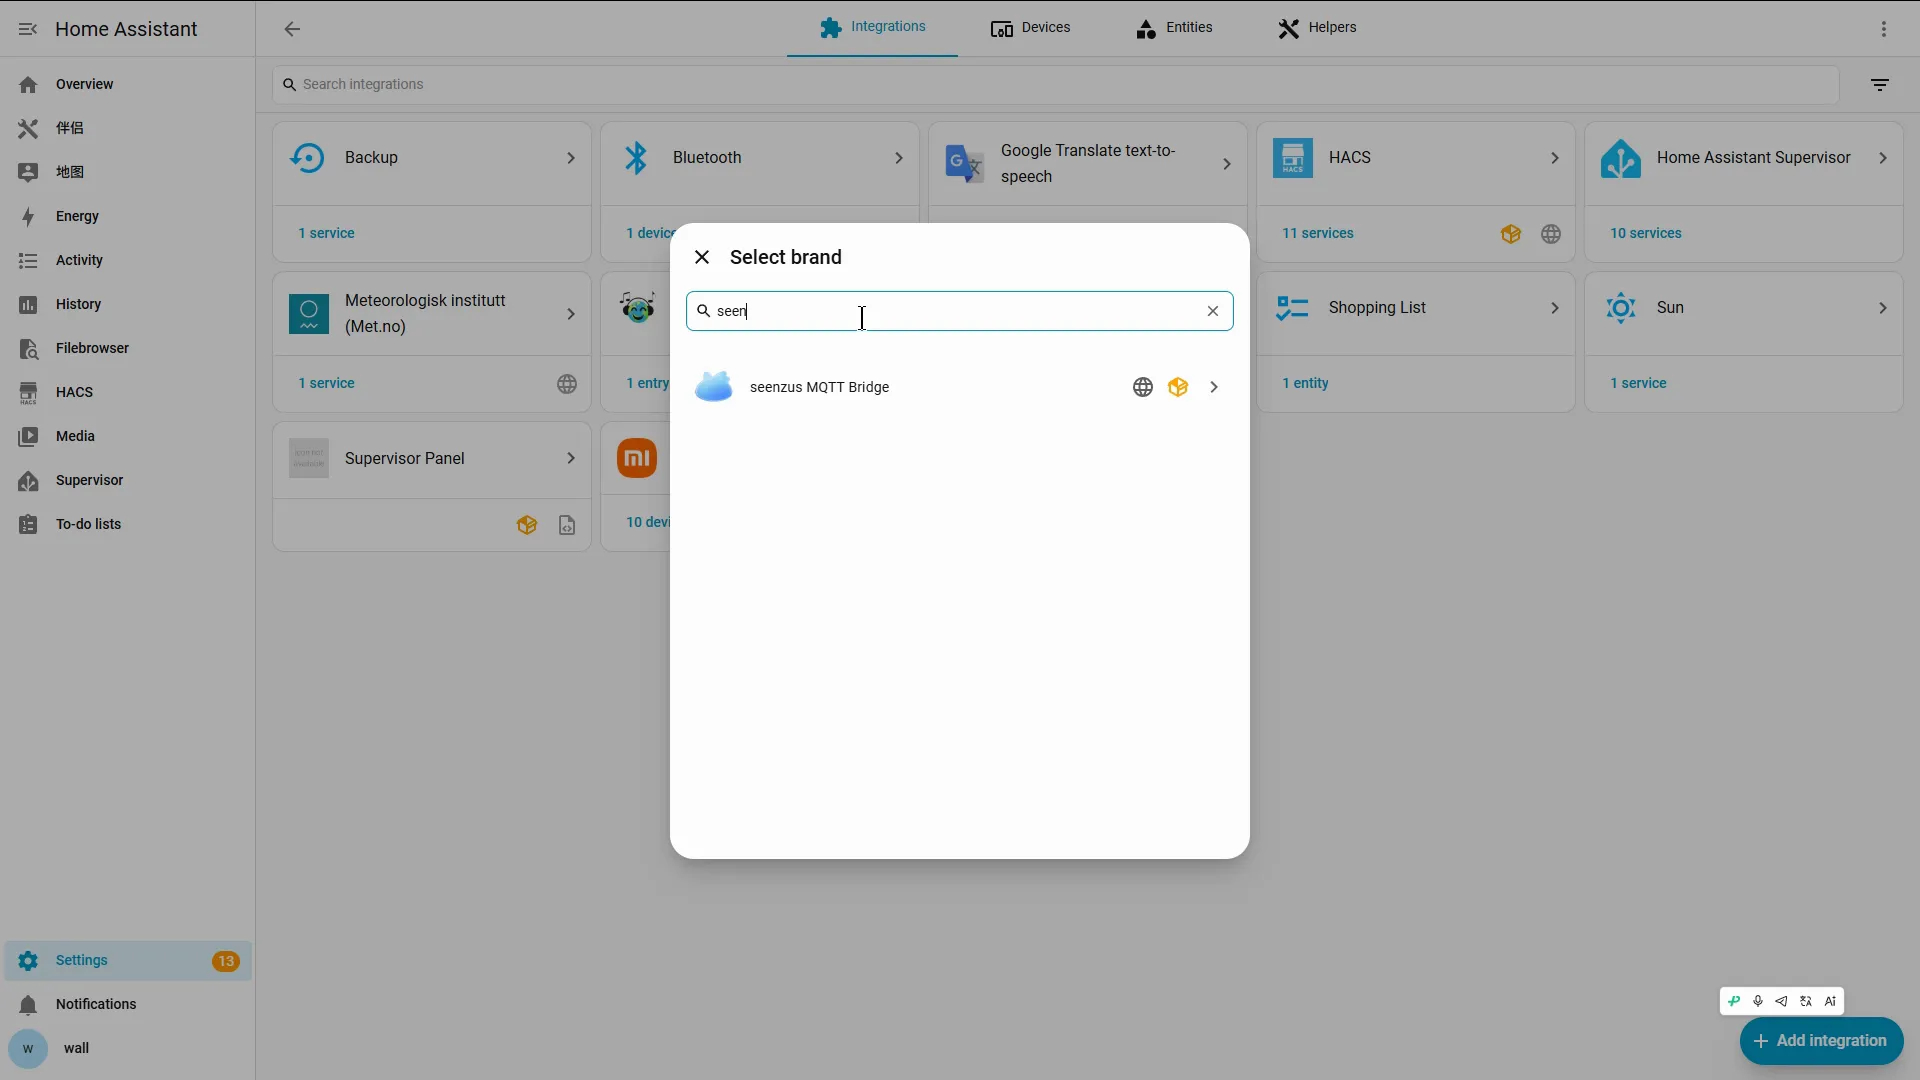
Section titled “Verify the install”After the restart, go to Settings → Devices & Services, click Add Integration at the bottom right, and search for seenzus MQTT Bridge.
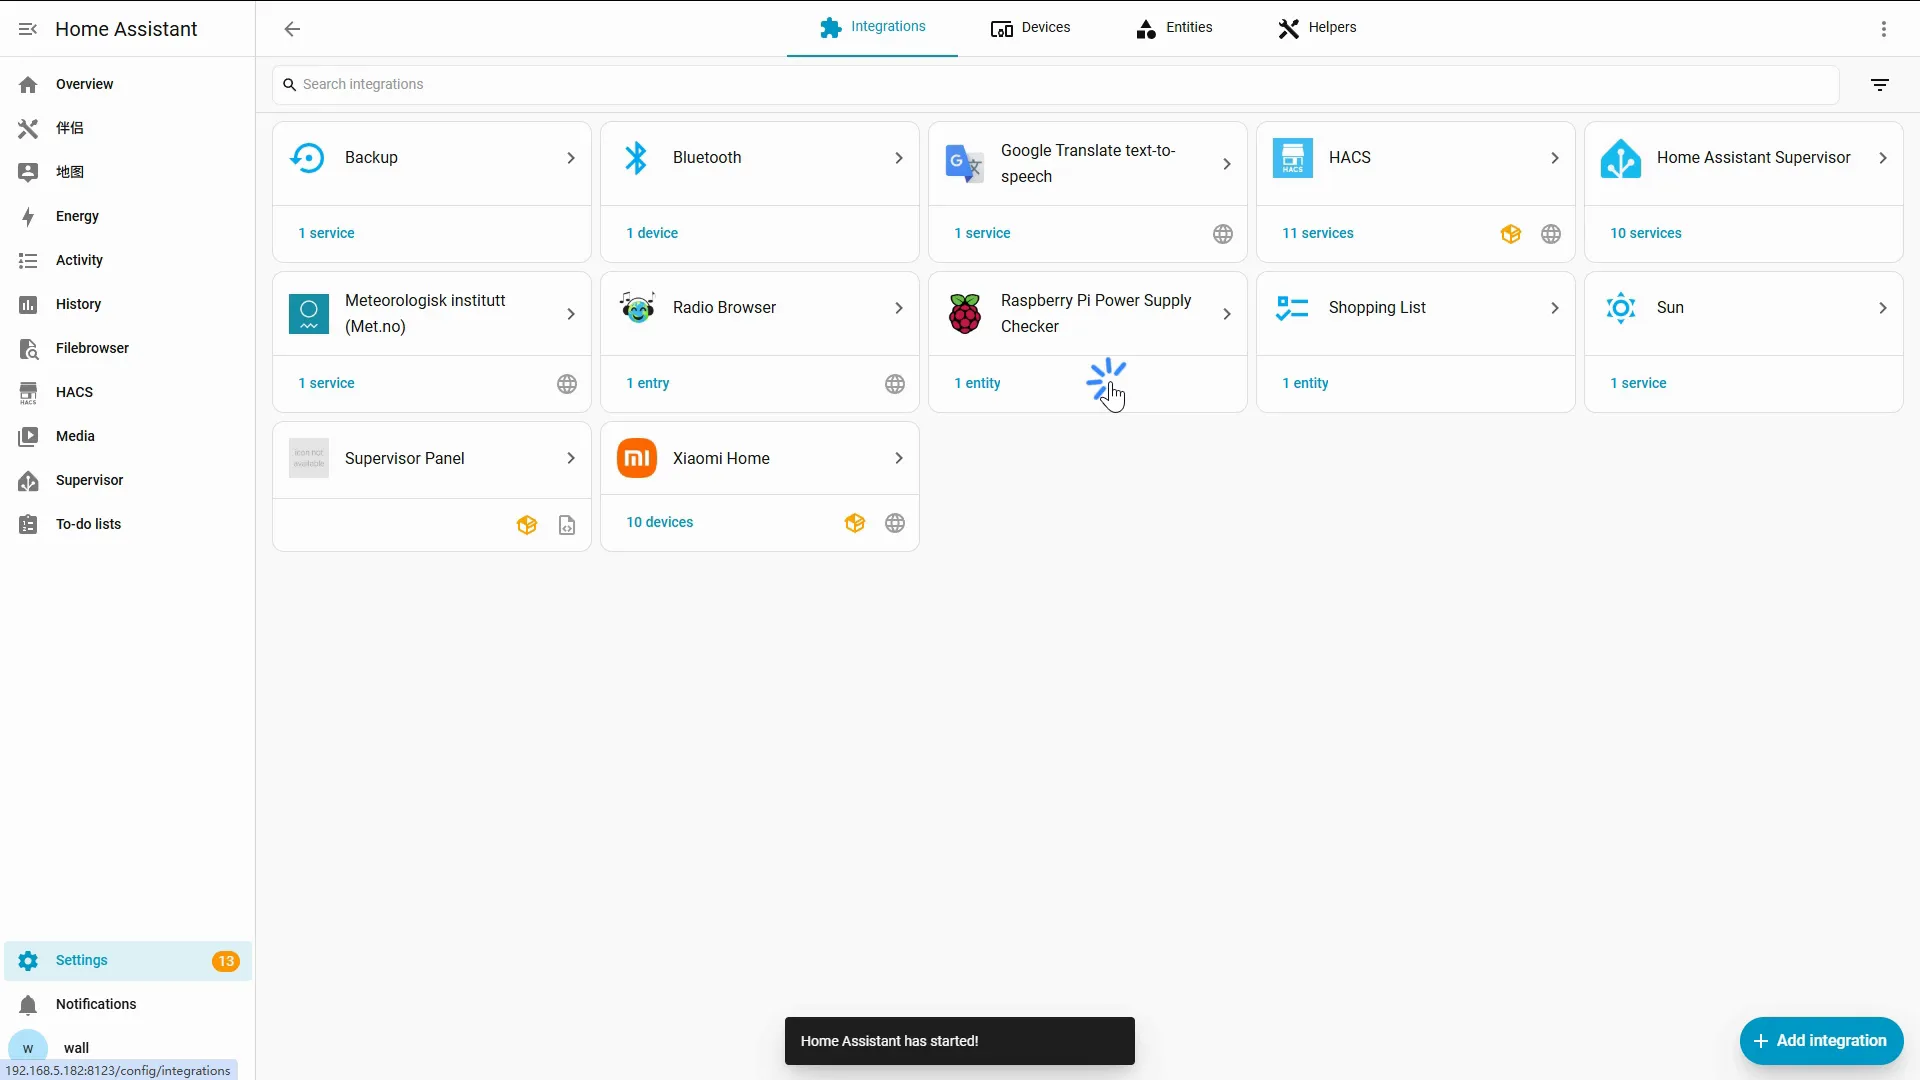
If seenzus MQTT Bridge appears in the search results, installation and restart succeeded. You do not need to create it from this dialog; close the search and return to seenzus.
Next: return to seenzus and pair
Section titled “Next: return to seenzus and pair”The installed Bridge is not connected to your seenzus Source yet. Return to seenzus and open Integrations → Add Source → Pair so the app can take you into the correct Home Assistant flow.
Return to the app and complete Quick Pair →
Source of truth · verified against plugin v0.2.1 · captured 2026-07 These docs are the single source of truth for install / branch content (docs-first): when the upstream bridge plugin’s config-flow / quick-pair UI changes, update the docs first, then align the app’s four in-app frames — both stamps bumped together.