

Camera Integration Tutorial
This tutorial explains how to connect a network camera to Home Assistant. The two mainstream protocols today are ONVIF and RTSP, each with its own integration method. To find out whether a specific camera supports a given protocol, ask the camera vendor.
Version Information
Section titled “Version Information”| Item | OS | Core |
|---|---|---|
| Version | 14.1.1 | 2025.2.2 |
Prerequisites
Section titled “Prerequisites”Before you start, make sure:
- Your Home Assistant is running normally and you can access its admin interface.
- You have confirmed that the camera supports the ONVIF or RTSP protocol (ask the camera vendor).
- The HA box and the camera are on the same local network.
Tip: If you want to use Frigate, you must use the RTSP protocol.
Method 1: ONVIF Protocol
Section titled “Method 1: ONVIF Protocol”Highlights: Uses the standard ONVIF protocol. Besides viewing the video feed, you can also control features such as pan/tilt (PTZ). Within the same IP segment, ONVIF-capable software can automatically discover the camera.
Official documentation: https://www.home-assistant.io/integrations/onvif/
Step 1: Add the ONVIF Integration
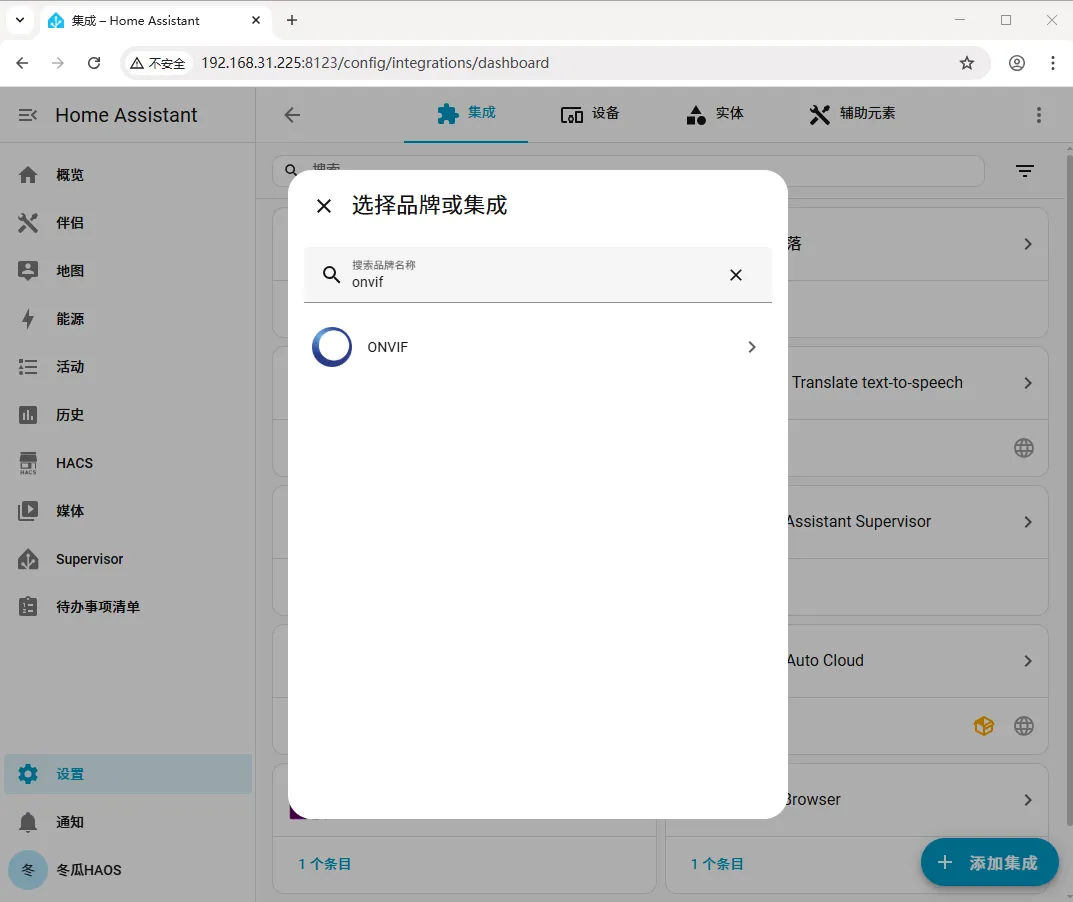
Section titled “Step 1: Add the ONVIF Integration”In HA, go to Settings > Devices & Services > Integrations > Add Integration > search for “ONVIF”.
Step 2: Automatic Discovery
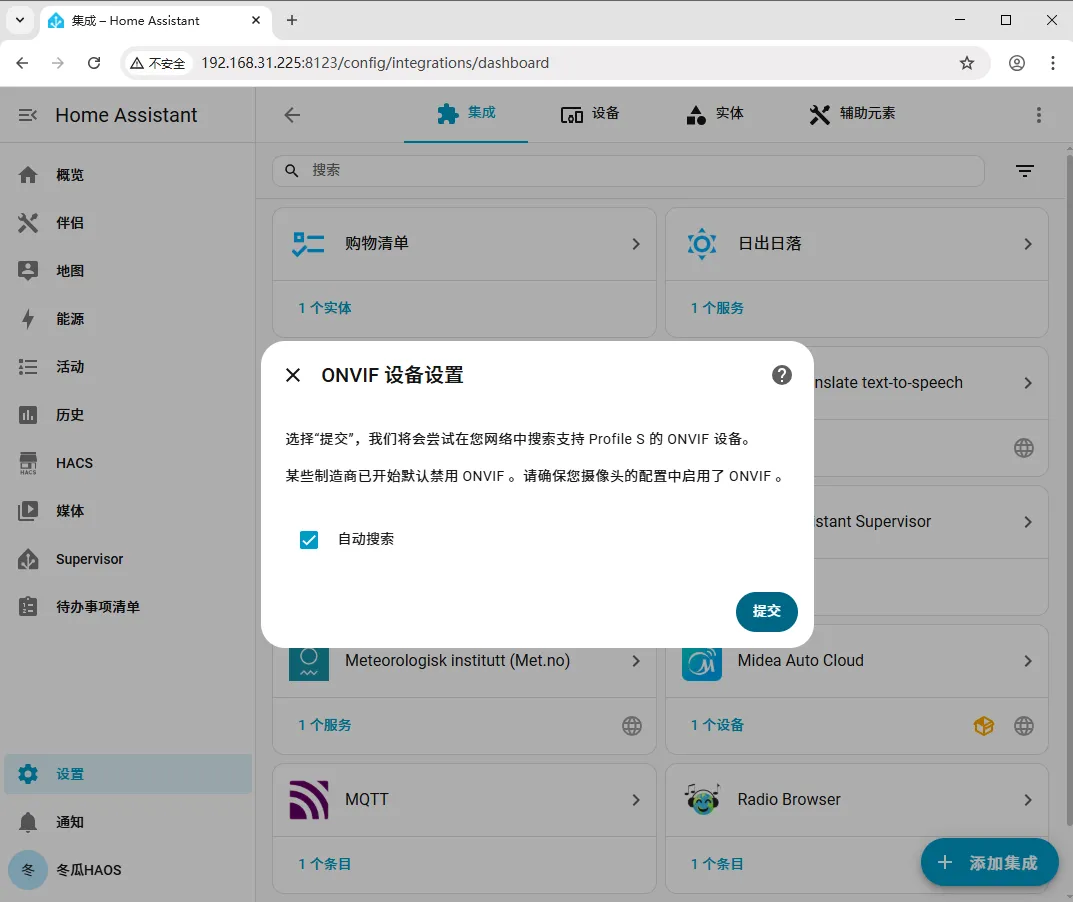
Section titled “Step 2: Automatic Discovery”Check “Auto discovery” and click “Submit”.
Step 3: Select the Camera
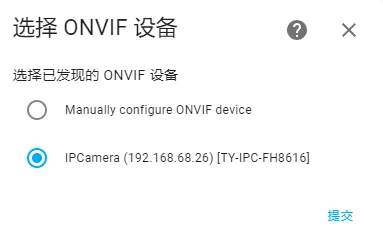
Section titled “Step 3: Select the Camera”Select the camera you want to add and click Submit.
Step 4: Fill In the Parameters
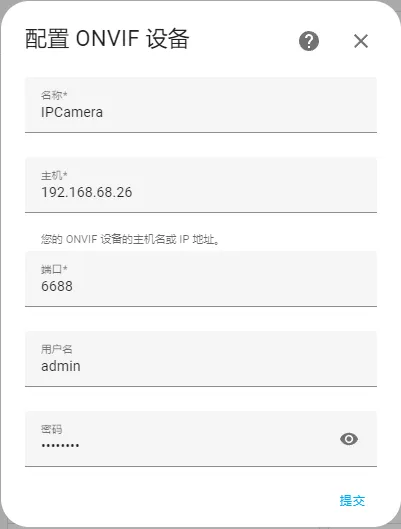
Section titled “Step 4: Fill In the Parameters”Fill in the corresponding parameters.
Step 5: Finish Adding
Section titled “Step 5: Finish Adding”Click Finish.
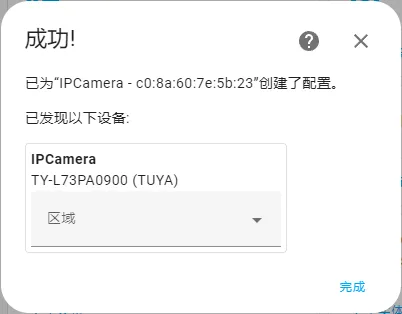
Step 6: View the Video Feed
Section titled “Step 6: View the Video Feed”Find and open the “ONVIF” integration, and you will see the main-stream video feed from the camera.
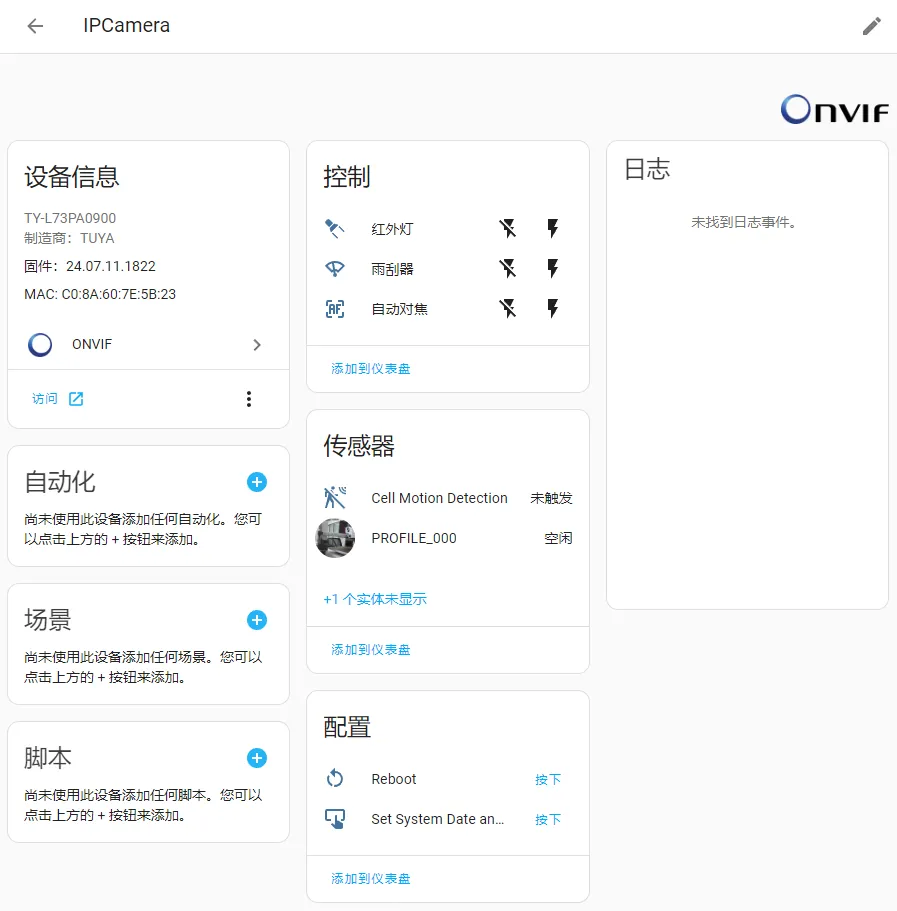
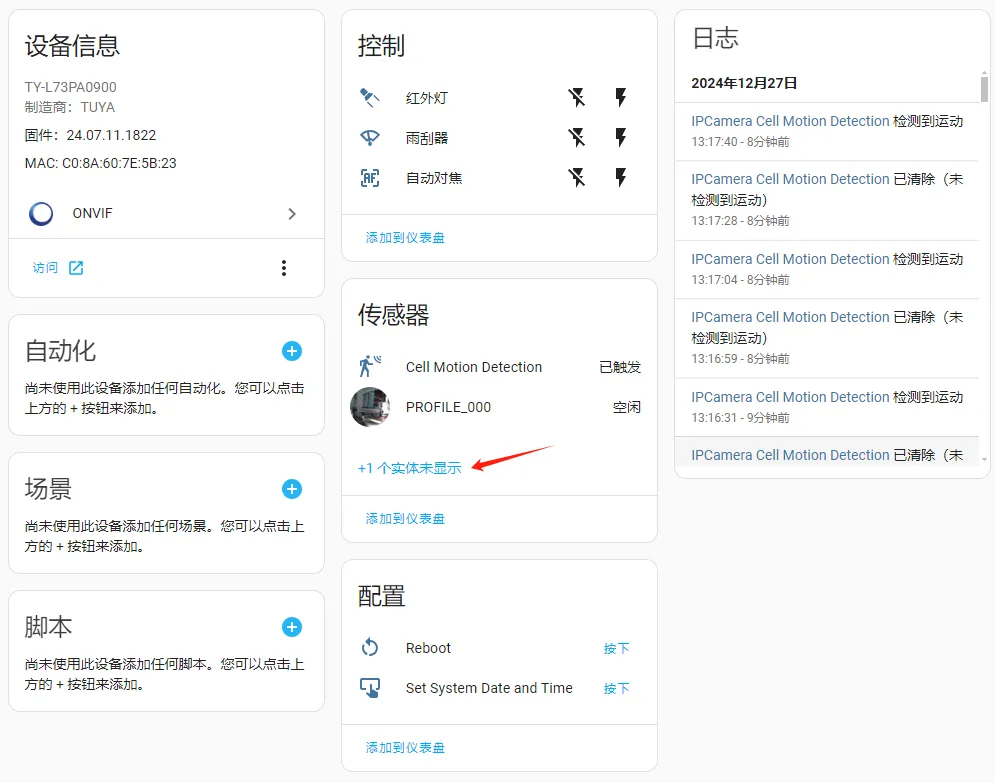
Step 7: Switch to the Sub Stream (Open the Entity)
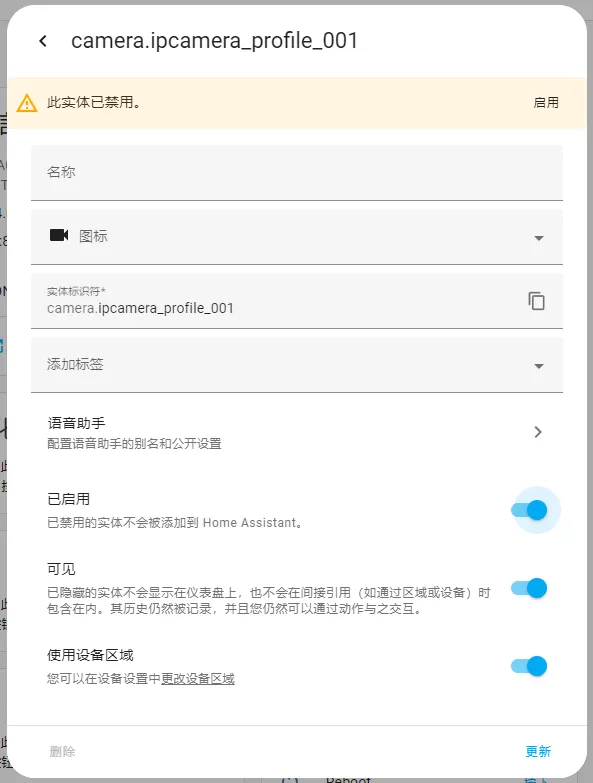
Section titled “Step 7: Switch to the Sub Stream (Open the Entity)”Because the main stream consumes a lot of system resources, we recommend switching to the sub stream. Click “x entities not shown”, then find and click “PROFILE_001” (the name may vary).
Step 8: Open the Entity Settings
Section titled “Step 8: Open the Entity Settings”Once inside, click the gear icon in the top-right corner.
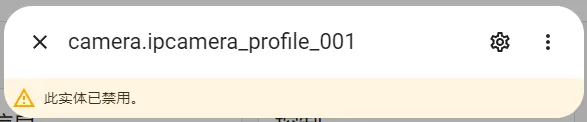
Step 9: Enable the Sub Stream
Section titled “Step 9: Enable the Sub Stream”Click “Enabled” and then click “Update”.
Step 10: Disable the Main Stream
Section titled “Step 10: Disable the Main Stream”Disable the main stream using the same general method.
Method 2: RTSP Protocol
Section titled “Method 2: RTSP Protocol”Official documentation: https://www.home-assistant.io/integrations/generic/
Step 1: Add the Generic Camera Integration
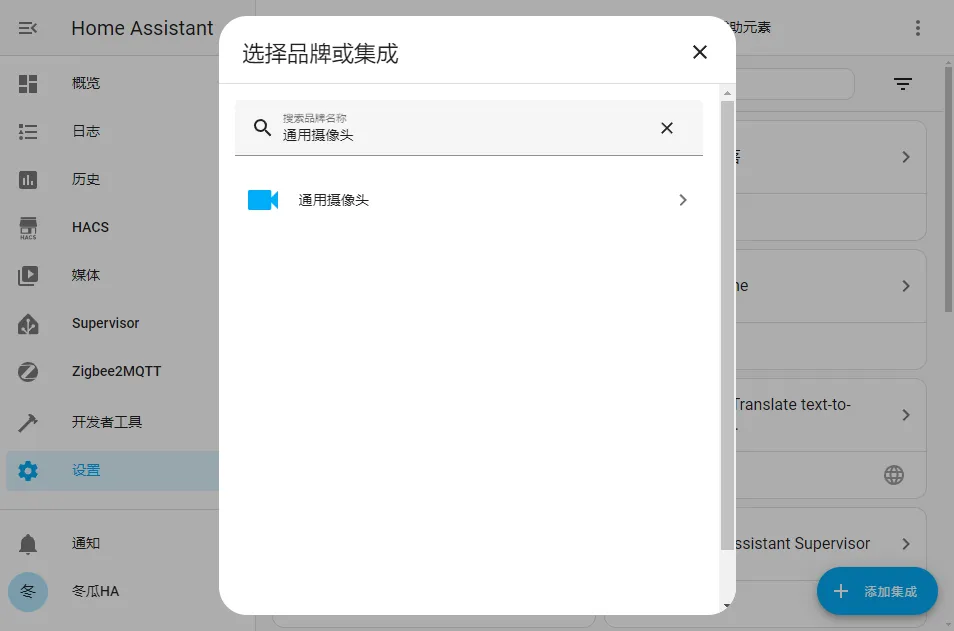
Section titled “Step 1: Add the Generic Camera Integration”In HA, go to Settings > Devices & Services > Integrations > Add Integration > search for “Generic Camera”.
Step 2: Fill In the Configuration Parameters
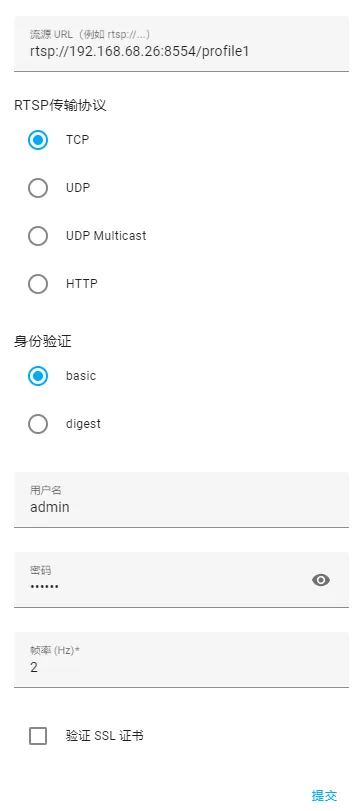
Section titled “Step 2: Fill In the Configuration Parameters”Referring to the glossary in the table below, fill in the configuration parameters in the dialog and click “Submit”.
| No. | Field | Description |
|---|---|---|
| 1 | Stream source URL | The device’s IP address and path |
| 2 | RTSP protocol | The network transport protocol to use |
| 3 | Authentication | The default, basic, is fine |
| 4 | Username | The account for the camera’s admin interface |
| 5 | Password | The password for the camera’s admin interface |
| Problem | Solution |
|---|---|
| Not sure which protocol the camera supports | Ask the camera vendor to confirm whether it supports ONVIF or RTSP. |
| Want to use Frigate | You must connect via the RTSP protocol. |
| Stuttering video or high system resource usage | With ONVIF, the main stream is very resource-intensive. Open the entity settings and switch to the sub stream (PROFILE_001), then disable the main stream. |
| ONVIF auto discovery cannot find the camera | Make sure the camera and HA are on the same IP segment and that the camera’s ONVIF feature is enabled. |
Summary
Section titled “Summary”The core camera integration flow is: first confirm which protocol the camera supports, then pick one of the two methods — ONVIF (PTZ control and auto discovery; remember to switch to the sub stream to save resources) or RTSP (use “Generic Camera” and fill in the stream source URL plus username/password; Frigate requires this method).