

Apple HomeKit Bridge Setup Guide
The Apple HomeKit Bridge integration bridges devices from Home Assistant into Apple Home (HomeKit), letting you control HA devices from the Home app on your iPhone / iPad. One important note: it bridges individual entities of a device, not the entire device as a whole — this differs from how third-party devices such as Xiaomi, Midea, and Haier work. This guide walks through the full process of setting up and using the Apple HomeKit Bridge integration on Donggua HAOS.
Version information
Section titled “Version information”| Name | OS | Core |
|---|---|---|
| Version | 17.0 | 2025.2.1 |
Before you start
Section titled “Before you start”Before getting started, make sure:
- Your HA box, computer, and the devices to be added are all on the same local network (see the “Smart Device Network Setup” doc for detailed network settings).
- You have an Apple device (iPhone or iPad) with the Home app ready, for scanning the QR code to add the bridge.
Important: this integration bridges individual entities of a device, not the entire device as a whole. This differs from how third-party devices such as Xiaomi, Midea, and Haier work — please keep this in mind.
Setup steps (establishing the HomeKit Bridge connection)
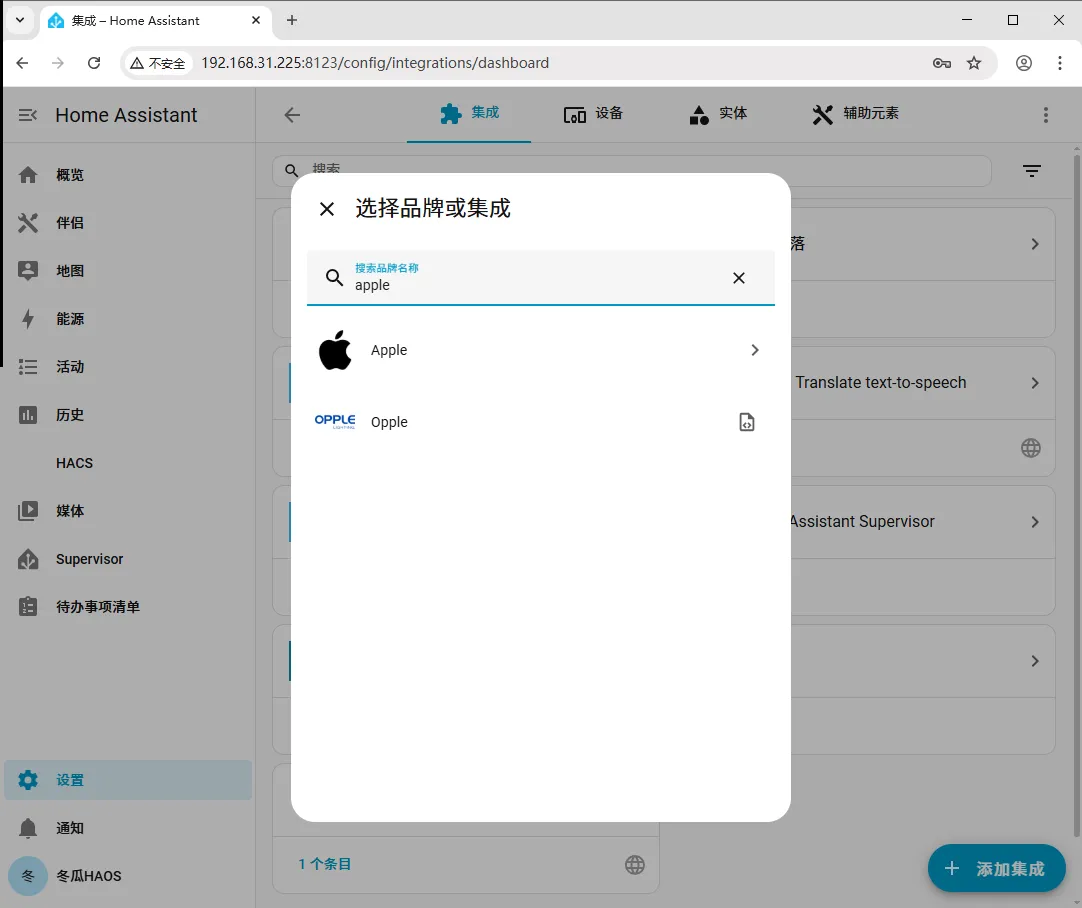
Section titled “Setup steps (establishing the HomeKit Bridge connection)”Step 1: Add the integration and search for apple
Section titled “Step 1: Add the integration and search for apple”Go to Settings → Devices & Services → Integrations → Add Integration, and search for apple.
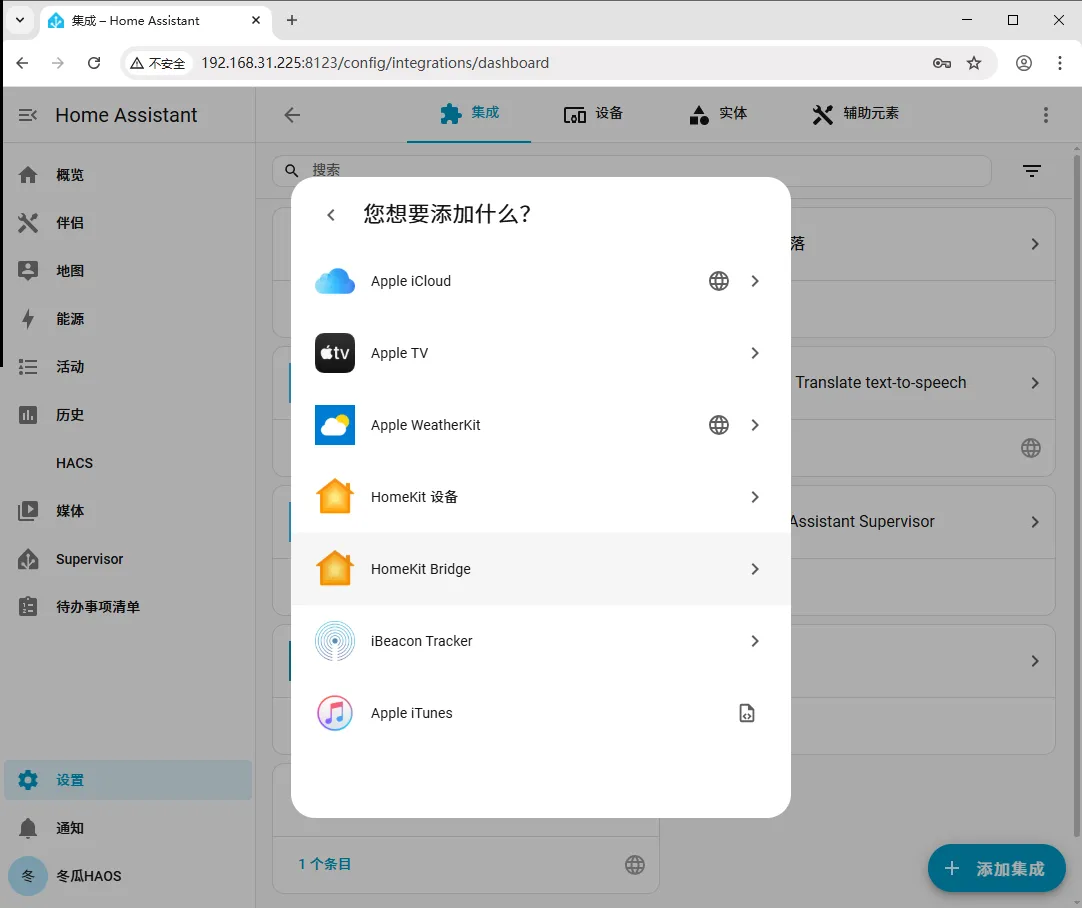
Step 2: Select HomeKit Bridge
Section titled “Step 2: Select HomeKit Bridge”Click Apple, then click HomeKit Bridge.
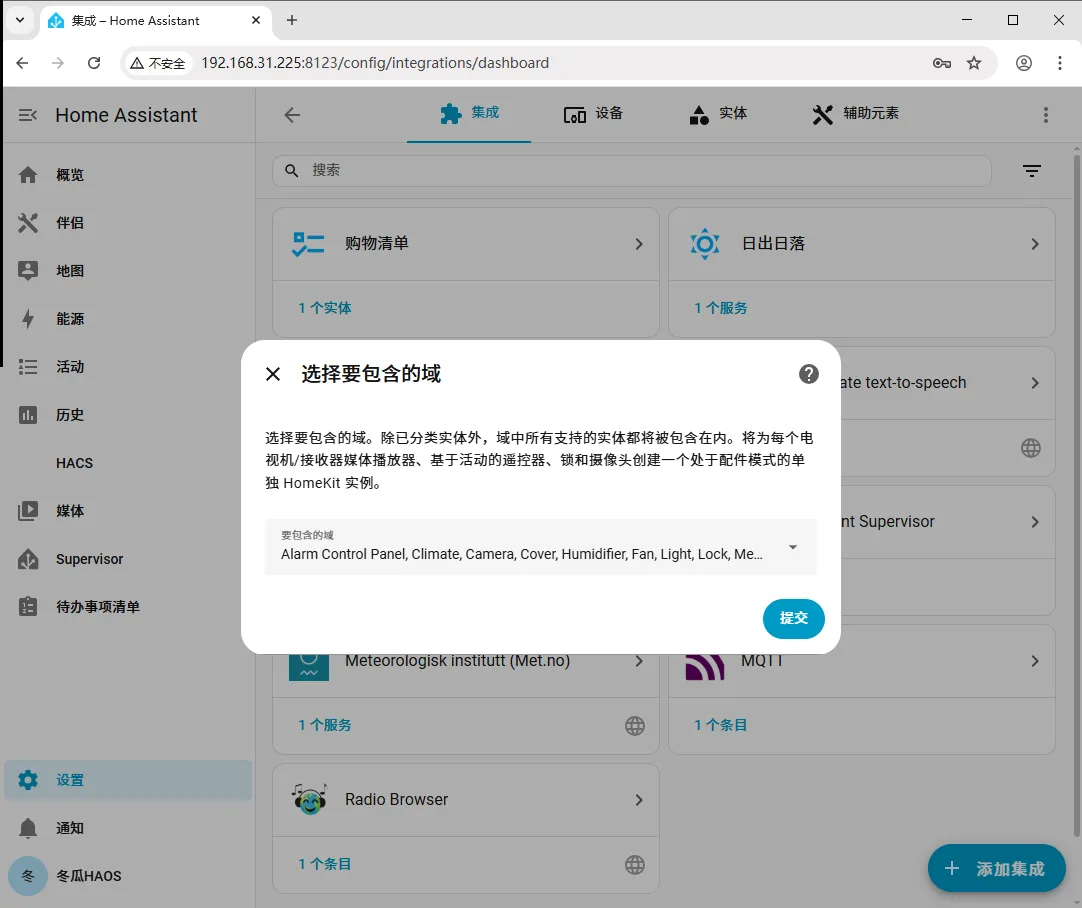
Step 3: Submit twice
Section titled “Step 3: Submit twice”Click Submit twice in a row.
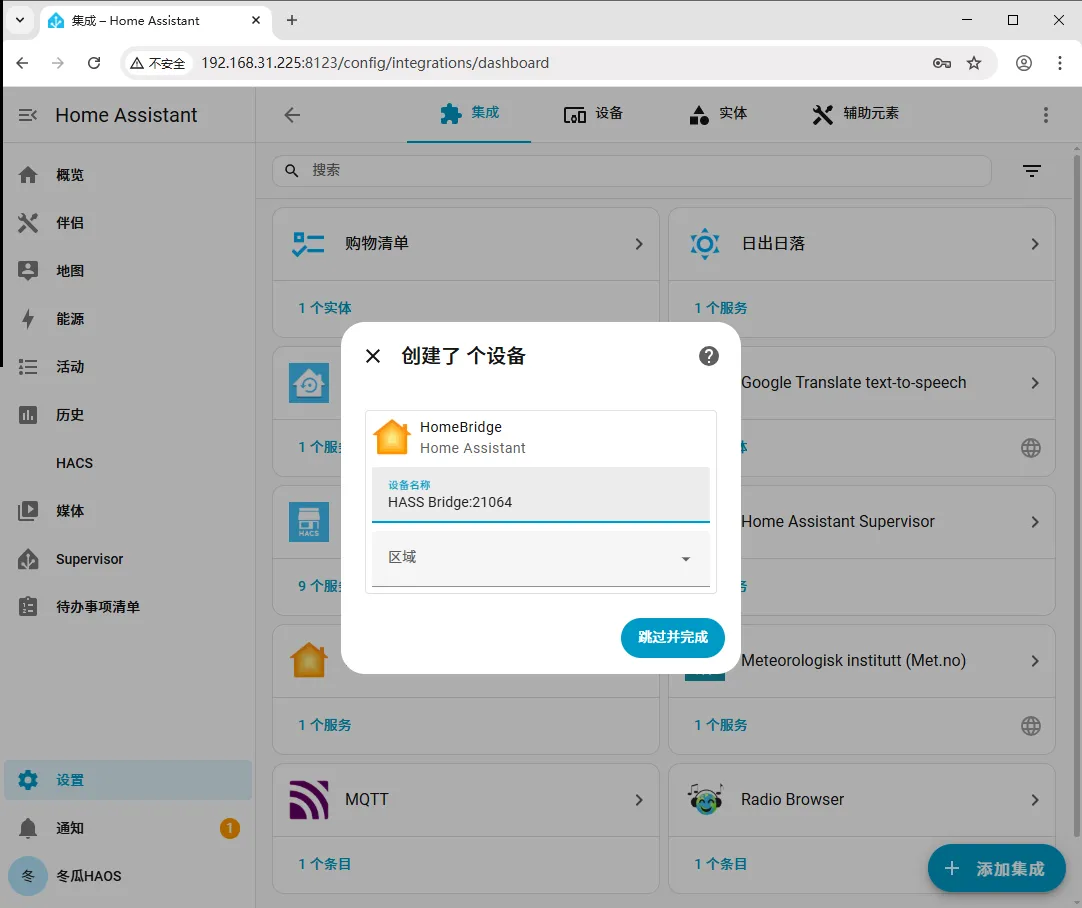
Step 4: Close the dialog
Section titled “Step 4: Close the dialog”Click X to close the dialog.
Note: do not click “Skip and finish” here, or you will be taken inside the integration.
Adding devices to Apple Home
Section titled “Adding devices to Apple Home”Step 1: Open the configuration and choose the inclusion mode
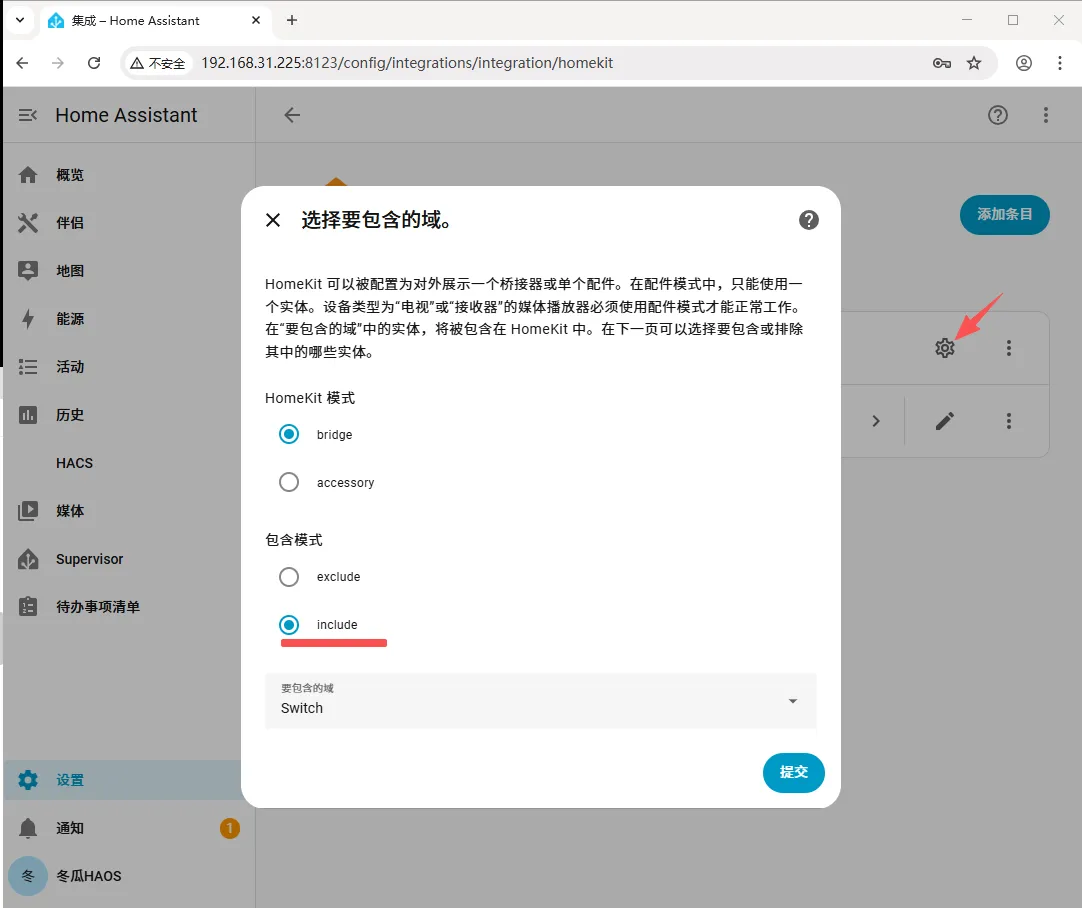
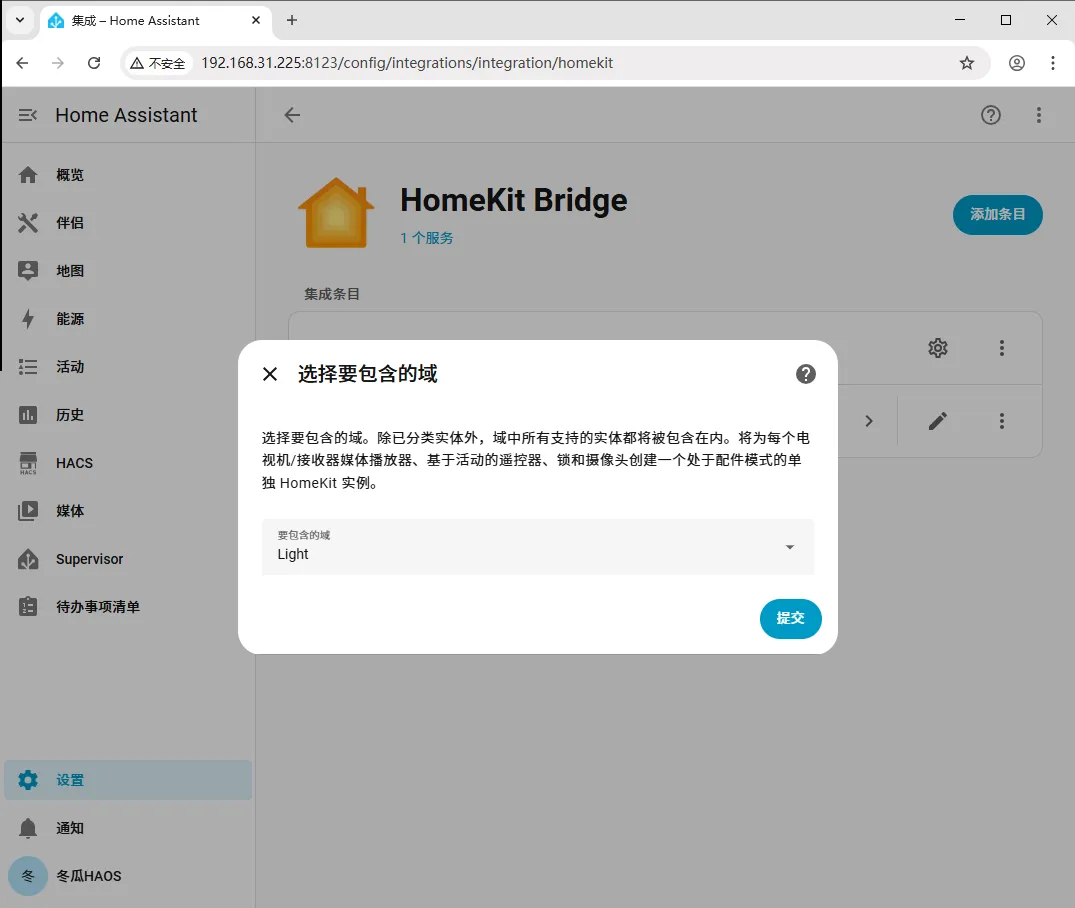
Section titled “Step 1: Open the configuration and choose the inclusion mode”Open HomeKit Bridge and click the ⚙ icon to configure it. Under “Inclusion mode”, choose include; for the “domains (device types)” to include, select only switch for now. If you have no switches, you can select Light instead, then click Submit.
Step 2: Select the entities to bridge
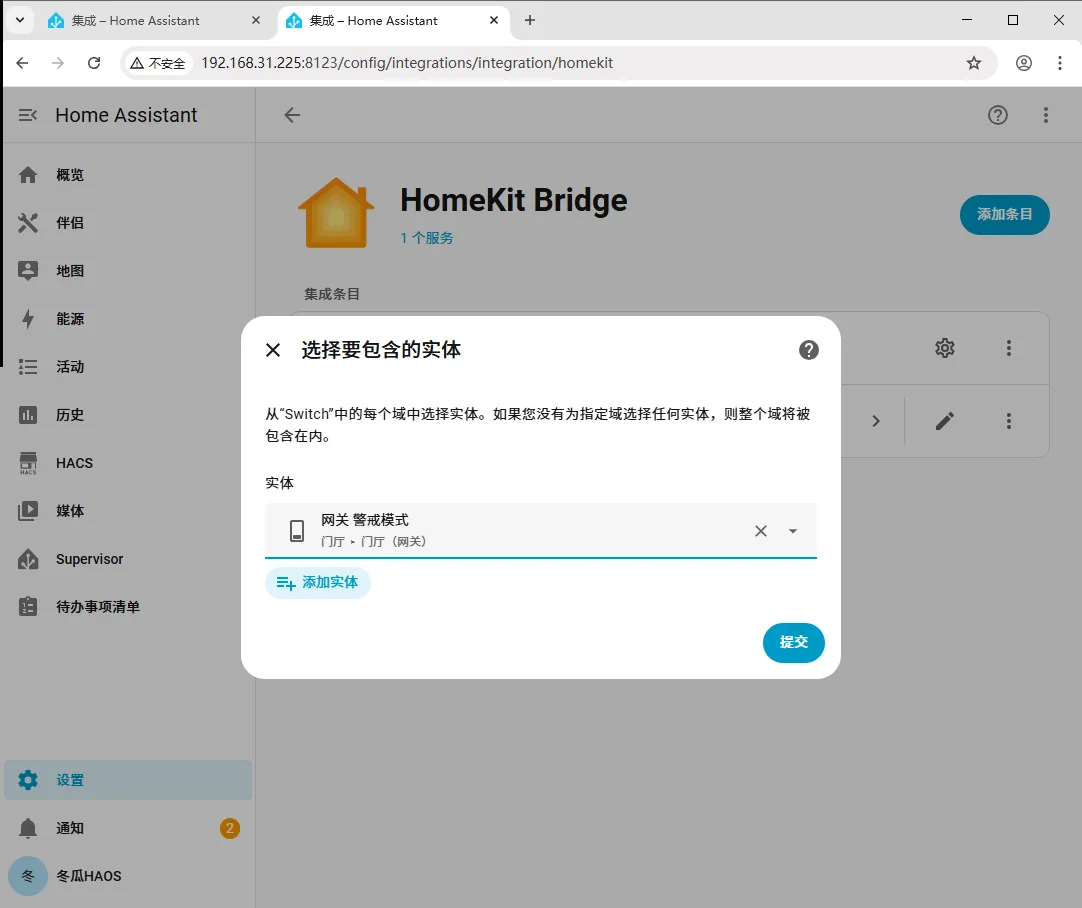
Section titled “Step 2: Select the entities to bridge”In the entities field, you can paste an entity ID (see the related doc for how to look it up) or select one directly. For your first attempt, add only one entity to avoid mistakes. Click Submit, then click Finish in the dialog.
Step 3: Open the notifications menu
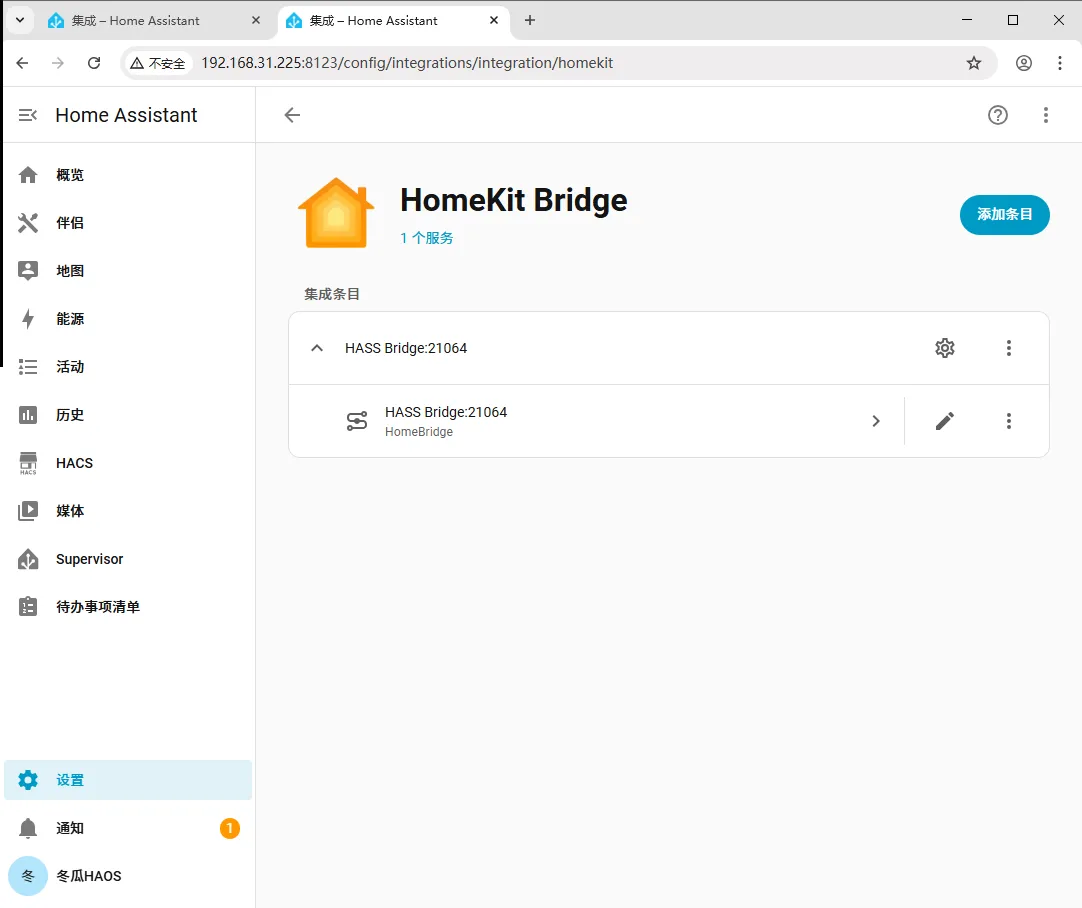
Section titled “Step 3: Open the notifications menu”Click the “Notifications” menu on the left.
Step 4: Find the HomeKit Bridge QR code
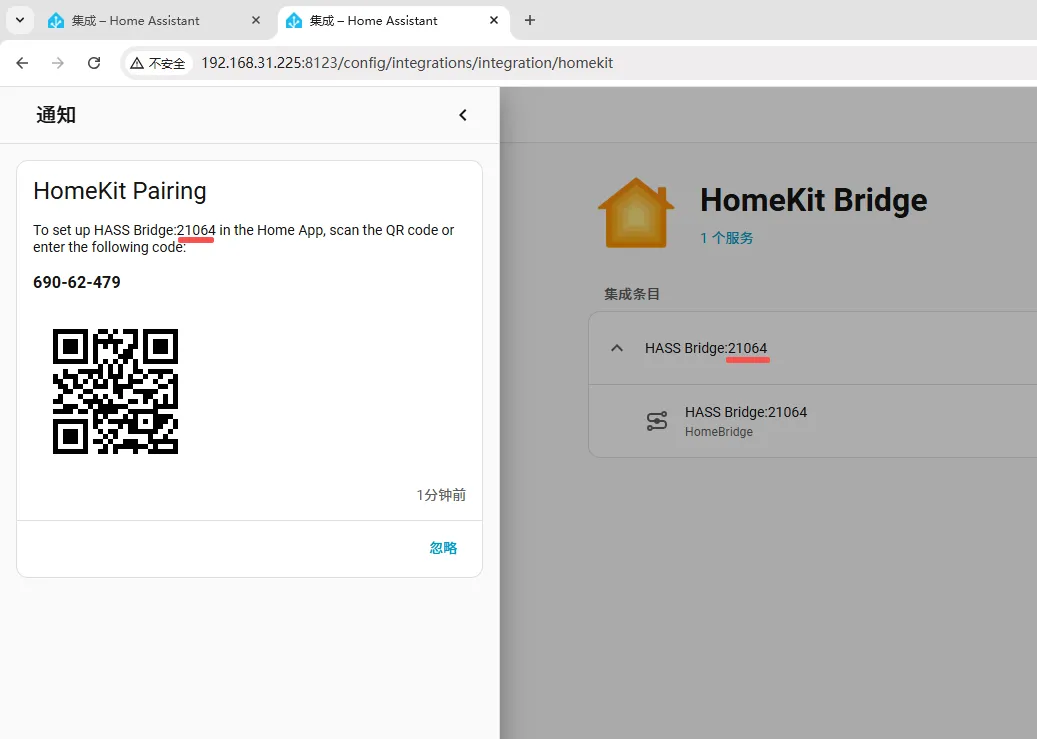
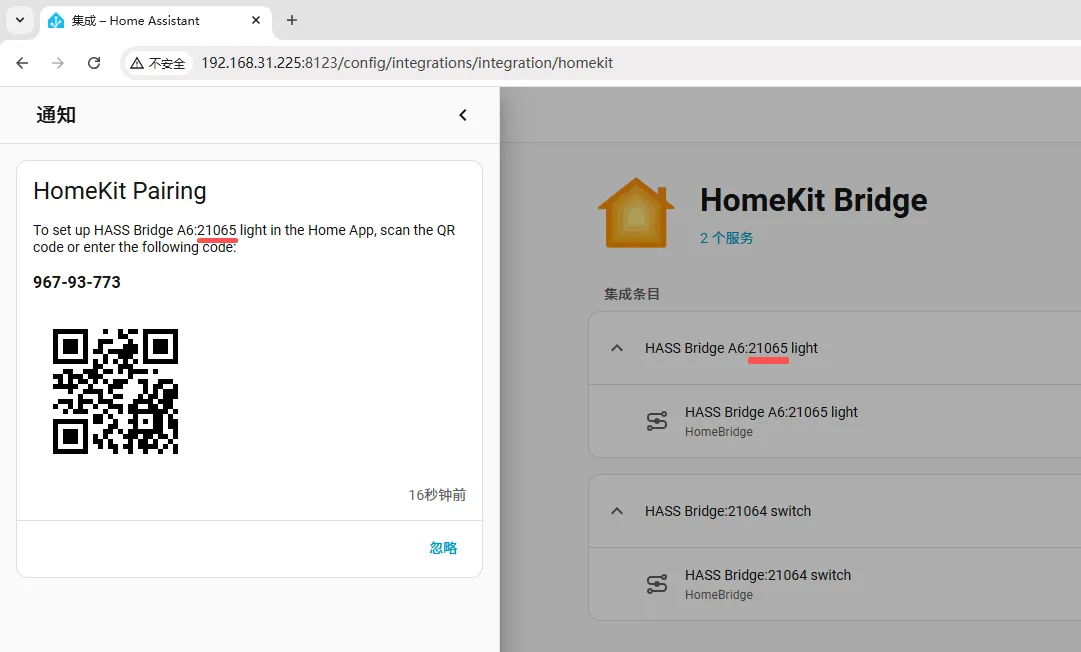
Section titled “Step 4: Find the HomeKit Bridge QR code”Locate the “HomeKit Bridge” QR code. Normally the first bridge is named HASS Bridge:21064.
Step 5: Start adding in the Apple Home app
Section titled “Step 5: Start adding in the Apple Home app”On your iPhone or iPad, open the Home app, tap + in the top right corner, and choose Add or Scan Accessory.
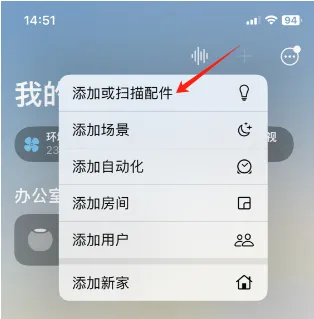
Step 6: Scan the QR code
Section titled “Step 6: Scan the QR code”Scan the QR code shown on the screen with your Apple device.
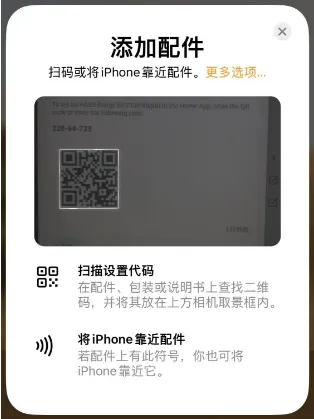
Step 7: Add Anyway
Section titled “Step 7: Add Anyway”Tap the Add Anyway button.
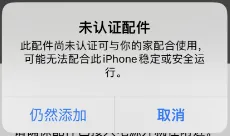
Step 8: Add to Apple Home
Section titled “Step 8: Add to Apple Home”Tap Add to Apple Home.
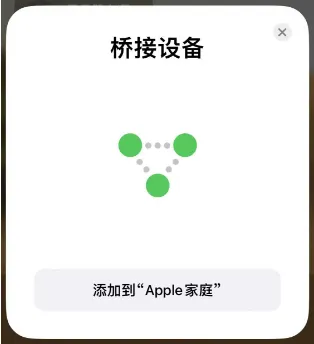
Step 9: Set the bridge location
Section titled “Step 9: Set the bridge location”In the “bridge location” option, scroll down to find Create New Room. We recommend naming the room HK Bridge and placing all future bridged devices there for easier management.
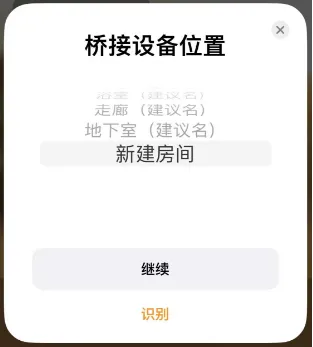
Step 10: Complete the remaining options as needed
Section titled “Step 10: Complete the remaining options as needed”Choose the remaining options according to your own preferences.
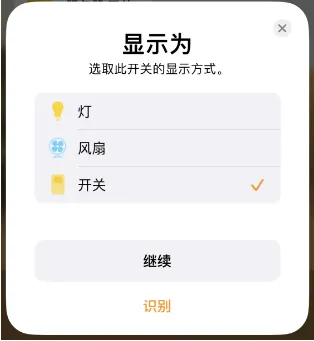
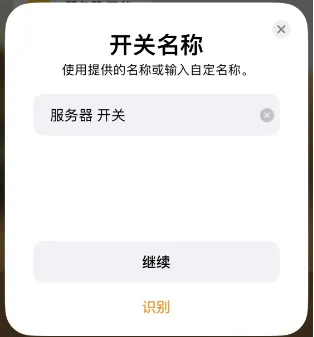
Step 11: Finish adding
Section titled “Step 11: Finish adding”Once the setup completes, the device will appear in Apple Home.

Advanced usage
Section titled “Advanced usage”Creating multiple bridges
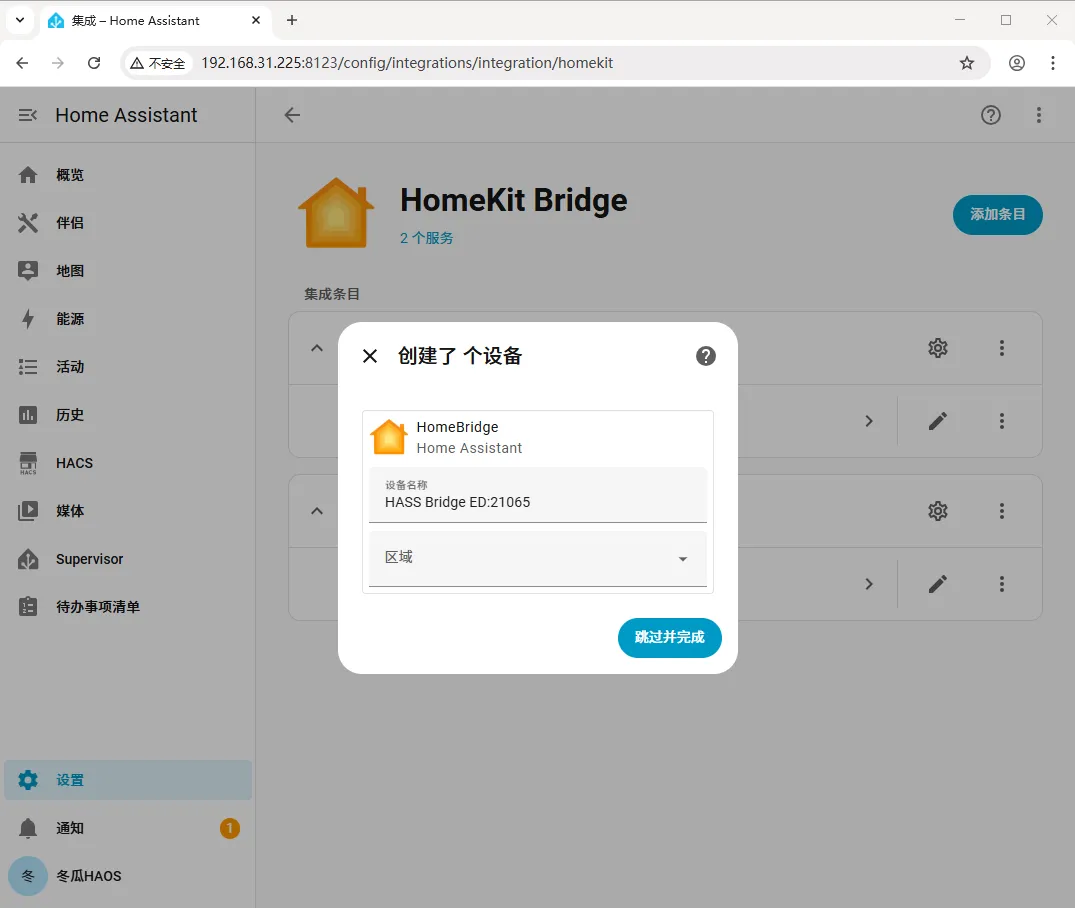
Section titled “Creating multiple bridges”We recommend creating a separate “HomeKit Bridge” for each device type for easier management. Open “HomeKit Bridge”, click Add Entry, then click Skip and finish; repeat this for each additional device type.
Benefits of this approach:
- A mistake won’t affect all your devices;
- You can delete a single device type independently;
- It supports organizing devices by room or category.
Renaming a bridge
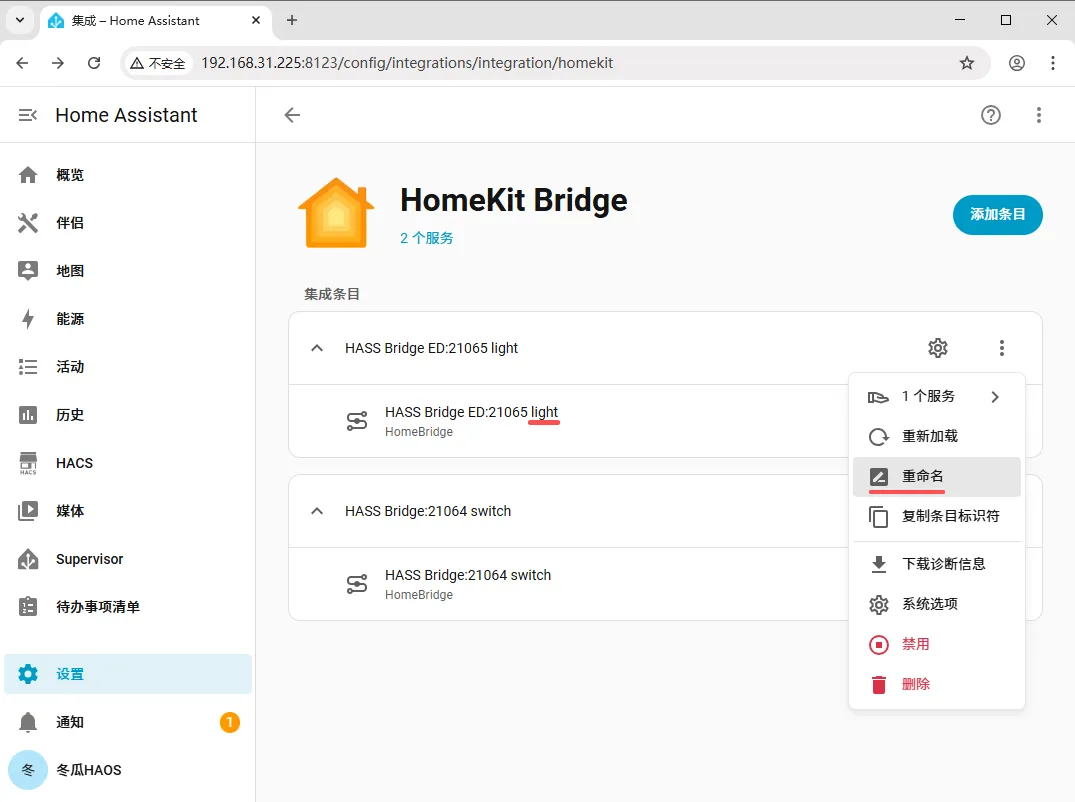
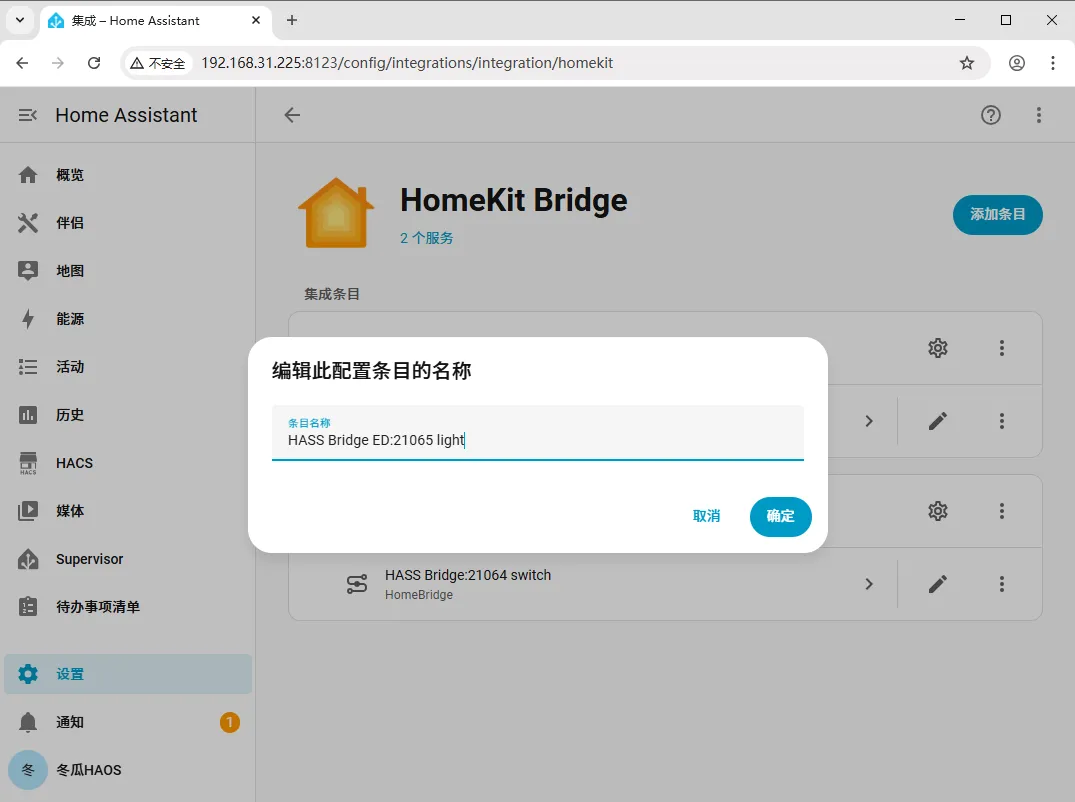
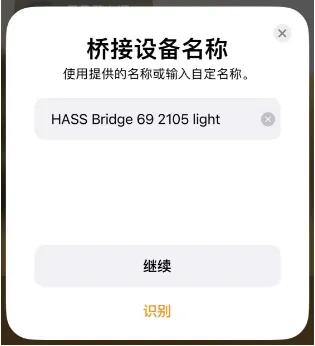
Section titled “Renaming a bridge”Click the ︙ menu next to the bridge you want to rename, choose Rename, enter the new name in the dialog, and click OK. We recommend renaming it to the same name in Apple Home as well.
Handling failed additions
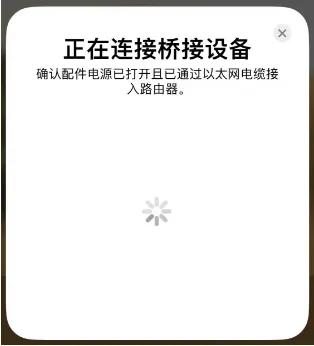
Section titled “Handling failed additions”If a device can’t be added or keeps loading forever, delete that “HomeKit Bridge” and then use “Add Entry” to create it again.
Removing a bridge from the Home app
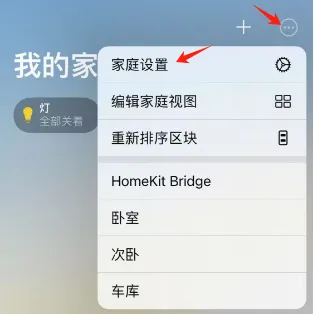
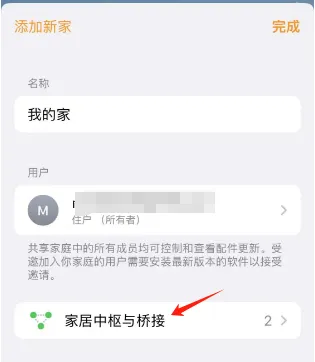
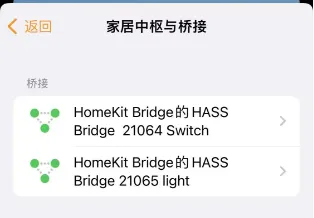
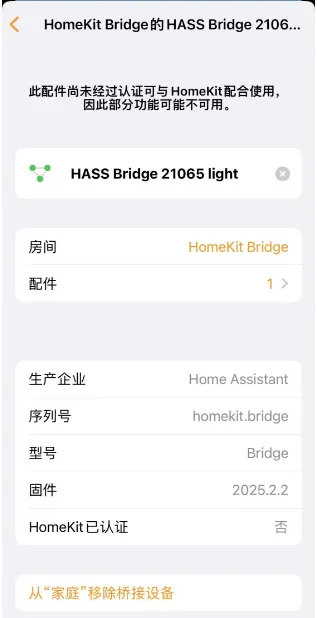
Section titled “Removing a bridge from the Home app”Go to Home → ┄ → Home Settings → Home Hubs & Bridges, select the bridge to delete, then choose Remove Bridge from Home.
Excluding (removing) a specific device
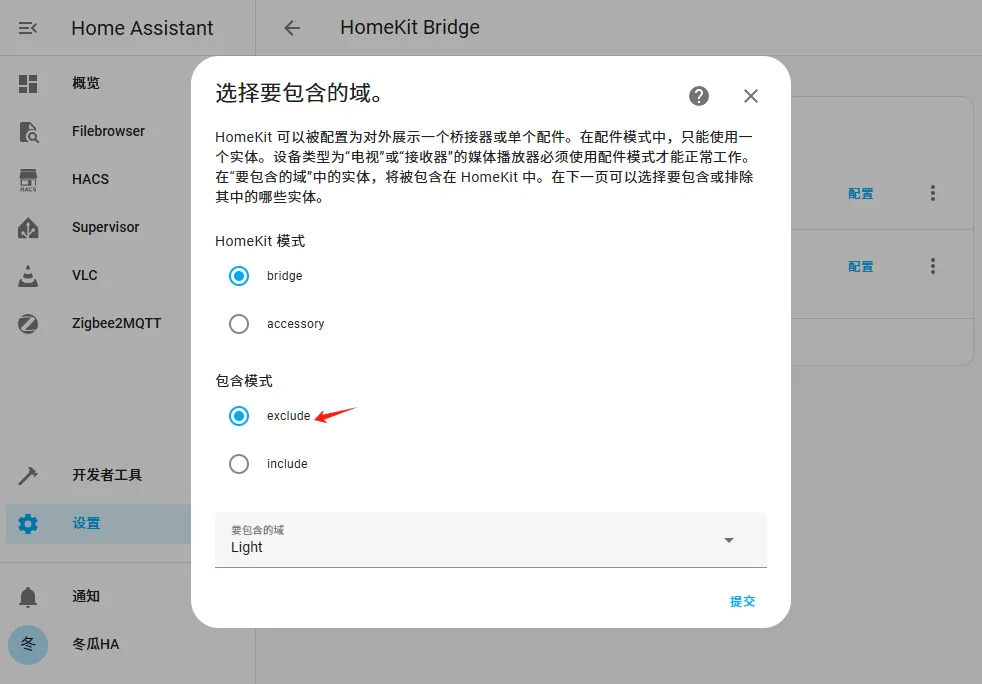
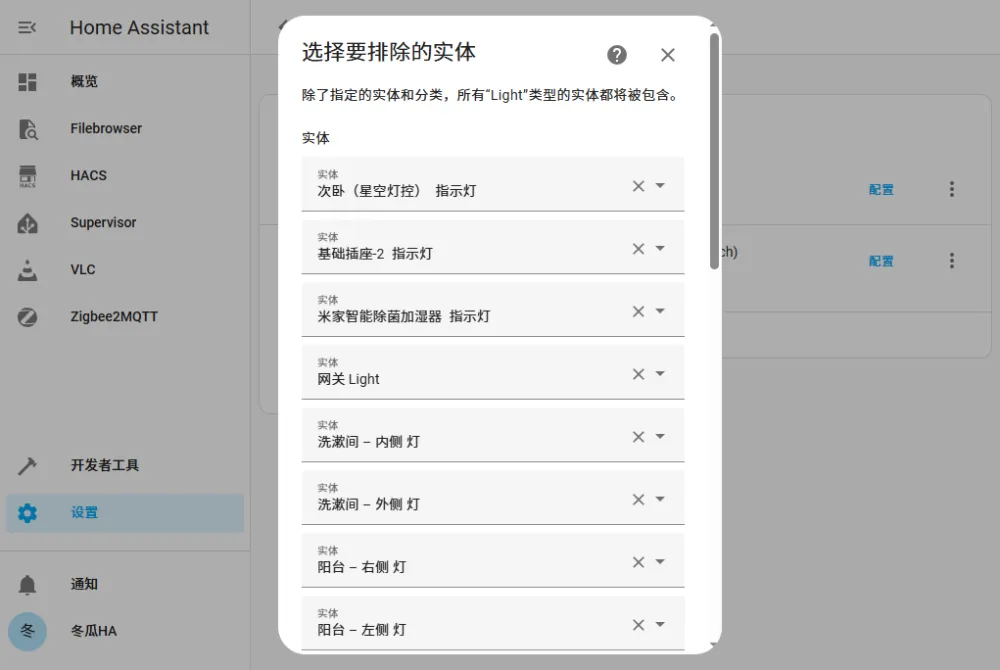
Section titled “Excluding (removing) a specific device”Open “HomeKit Bridge”, click Configure next to the device you want to exclude, set the “Inclusion mode” to exclude, and click Submit. Find the × next to the entity to exclude, wait a moment, and the entity will be removed from the Home app.
| Problem | Solution |
|---|---|
| What to click in the last step of connection setup | In step 4, click X to close the dialog. Do not click “Skip and finish”, or you will be taken inside the integration. |
| Device can’t be added / keeps loading | Delete that “HomeKit Bridge” and try “Add Entry” again. |
| Adding multiple entities at once is error-prone | Add only one entity the first time; once confirmed working, add more gradually. |
| Want to organize devices by category | Create a separate “HomeKit Bridge” per device type, and put them all in the “HK Bridge” room. |
| Want to stop bridging a specific entity | In that bridge’s “Configure”, set the “Inclusion mode” to exclude, submit, then click the × next to the entity to remove it. |
| Want to remove a whole bridge | In Home → Home Settings → Home Hubs & Bridges, select the bridge and choose Remove Bridge from Home. |
Summary
Section titled “Summary”The core flow for setting up Apple HomeKit Bridge is: add the apple integration → choose HomeKit Bridge → submit twice → close the dialog to establish the connection, then configure the inclusion mode (include + switch/light) → select entities → find the QR code in notifications → scan it with the Apple Home app → create an “HK Bridge” room → done. Remember that it bridges entities, not whole devices; organize bridges by device type, and if you hit problems, delete and recreate the bridge or use exclude to remove specific entities.